On-Prem Deployment & Installation

Introduction

vuLauncher is a specialized application designed to facilitate the installation of vuSmartMaps™ within a Virtual Machine (VM) based environment. It offers a user-friendly graphical user interface (UI) through which users can input essential details about the target environment.
Pre-requisites
Before utilizing vuLauncher, ensure the following prerequisites are met:
- A Virtual Machine with at least 6 cores, 64GB memory, and 200GB disk space.
- Create 3 mount points named data1, data2 and data3 only if there are no data partitions available.
- Run the below commands in the master node to create data partitions
- sudo mkdir /data1
- sudo chown -R vunet:vunet /data1
- sudo mkdir /data2
- sudo chown -R vunet:vunet /data2
- sudo mkdir /data3
- sudo chown -R vunet:vunet /data3
💡Note: Provide user name/user group according to the environment.
- The above three separate mount points are for Clickhouse, Minio and others. Hot tier is for others, cold tier is for MinIO and warm tier is for Clickhouse. Hot tier should have a minimum of 200GB disk space. Cold and Warm each should have a minimum 100 GB of disk space.
- One can also utilize a single mount point, that is for hot tier, with 200 GB disk space. If this is the case then select `ignore` as storage class in the Configure Disk page.
- A user with passwordless sudo privilege to be present on all the VMs.
- Supported OS
- Ubuntu – 20.04, 22.04
- RHEL – 7.x, 8.x , 9.x
- CentOS – 7.x,8.x
- Rocky – 9.x
- Oracle Linux – 7.x,8.x
- We should have a “/var” partition in all VMs with minimum 80GB to load the docker images.
Ports Description
Before proceeding, ensure that the following ports are properly configured on your system:
SN | Port | Protocol | Description |
1 | 6443 | TCP | Orchestration API port. Ports should be open between all vuSmartMaps server and site-manager servers |
2 | 2379 | TCP | Orchestration key value DB port. Ports should be open between all vuSmartMaps server and site-manager servers |
3 | 2380 | TCP | Orchestration key value DB port. Ports should be open between all vuSmartMaps server and site-manager servers |
4 | 10250 | TCP | Orchestration service port. Ports should be open between all vuSmartMaps server and site-manager servers |
5 | 10259 | TCP | Orchestration service port. Ports should be open between all vuSmartMaps server and site-manager servers |
6 | 10257 | TCP | Orchestration service port. Ports should be open between all vuSmartMaps server and site-manager servers |
7 | 9200 | TCP | Time Series NoSQL database port. Ports should be open between all vuSmartMaps server and site-manager servers |
8 | 9300 | TCP | Time Series NoSQL database port. Ports should be open between all vuSmartMaps server and site-manager servers |
9 | 6379 | TCP | In-memory database port. Ports should be open between all vuSmartMaps server and site-manager servers |
10 | 9082 | TCP | Kafka API port. Ports should be open between all vuSmartMaps server and site-manager servers |
11 | 9092 | TCP | Kafka server port. Ports should be open between all vuSmartMaps server and site-manager servers |
12 | 2181 | TCP | Kafka server port. Ports should be open between all vuSmartMaps server and site-manager servers |
13 | 2888 | TCP | Kafka server port. Ports should be open between all vuSmartMaps server and site-manager servers |
14 | 3888 | TCP | Kafka server port. Ports should be open between all vuSmartMaps server and site-manager servers |
15 | 443 | TCP | UI port. Ports should be open between all vuSmartMaps server and site-manager servers. Also it should be accessible from desktop |
16 | 8080 | TCP | Installer service port. Ports should be open between all vuSmartMaps server and site-manager servers. Also it should be accessible from desktop |
17 | 5432 | TCP | Time Series SQL database. Ports should be open between all vuSmartMaps server and site-manager servers |
18 | 22 | TCP | SSH port. Ports should be open between all vuSmartMaps server and site-manager servers |
19 | 30910,30901 | TCP | Object storage service port. Ports should be open between all vuSmartMaps server and site-manager servers. Also it should be accessible from desktop |
20 | 13000 | TCP | Webhook port. Ports should be open between all vuSmartMaps server and site-manager servers |
21 | 8123 | TCP | HyperScale database port. Ports should be open between all vuSmartMaps server and site-manager servers |
22 | 9000 | TCP | HyperScale database port. Ports should be open between all vuSmartMaps server and site-manager servers |
23 | 8472 | UDP | vxLan port. Ports should be open between all vuSmartMaps server and site-manager servers |
7. Ensure uniform credentials across all VMs i.e. same password or private key across all VMs
💡Note: Apart from Traefik, other services can’t switch to other ports if there is a conflict with default ports. So, for this release, the default service ports will be used.
Single Node Installation
Downloading the binary
- Download the NG installation binary using the below command
- wget https://download.vunetsystems.com/_Downloads_/_vuDocker_/vuSmartMaps_NG_2_8.tar.gz –user=<username> –password=<password> –no-check-certificate
💡Note: If you don’t have access to the download server, download the binaries directly from this URL
Please check with [email protected] for getting the Username and Password for getting the credentials for Download server
- Extract the tar file using
- tar -xvzf vuSmartMaps_NG_2_8.tar.gz
- Once extracted, start the launcher, using
- ./build/launcher_linux_x86_64
- Access the launcher UI from a web browser using
- “http://<public IP of the machine where the launcher is running>:8080”
Welcome Page
- This will be the starting page for Installation.
- Click the Proceed to install button, to move to the next stages.
Multi-Node Cluster Installation
In the case of vuSmartMaps’ multi-node cluster installation, it is recommended to have a separate node apart from all vuSmartMaps nodes where we will run vuLauncher and vuSiteManager.
A dedicated VM for SiteManager with a minimum configuration of 200GB disk space, 6 cores, and 64GB RAM. This VM must have connectivity to all other nodes where vuSmartMaps will be installed. The OS of the VM should be linux.
License configuration will be different for multi node installation, please check with [email protected] for getting the license according to the installation environment.
💡Note: The installation steps provided for single-node installation are applicable for the multi-node cluster installations of vuSmartMaps.
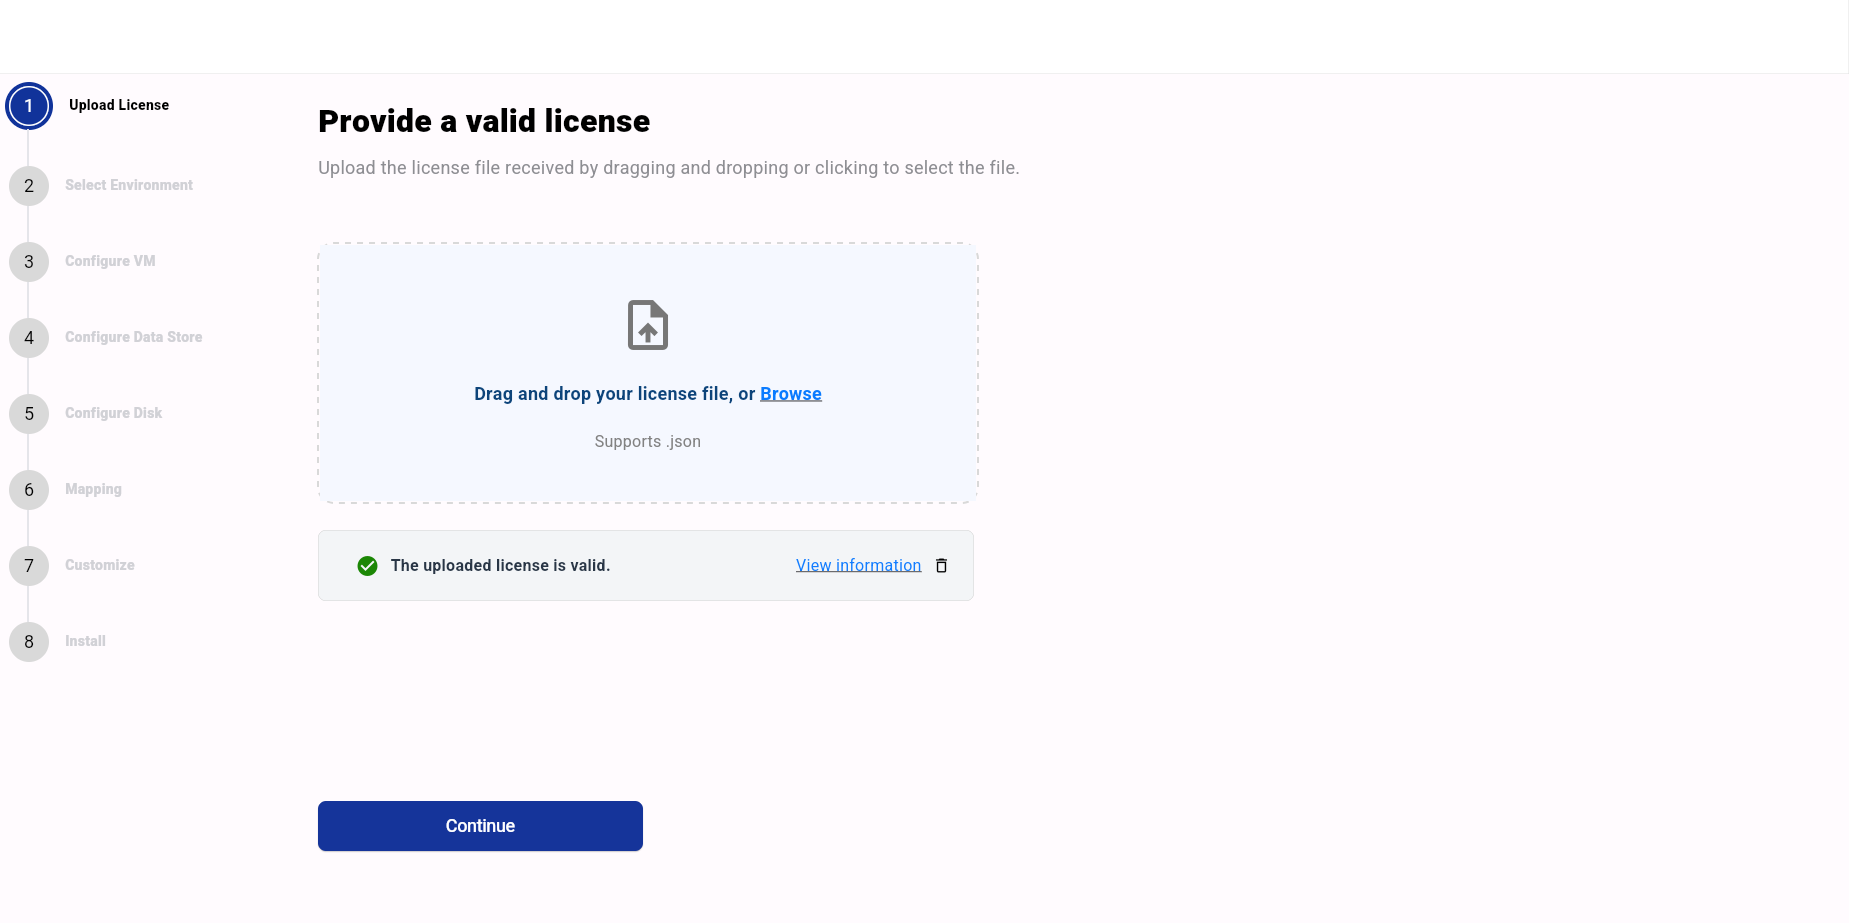
Upload License
- Here you need to provide a valid license. This license file will contain the services that are going to be installed and its required resources.
- Upload the valid license and click on Continue. If the license is invalid, please check the license format and retry.
💡Note: Please get the updated license file from [email protected]
Also, mention the kind of setup (single node/multi node) you’re doing for the deployment.
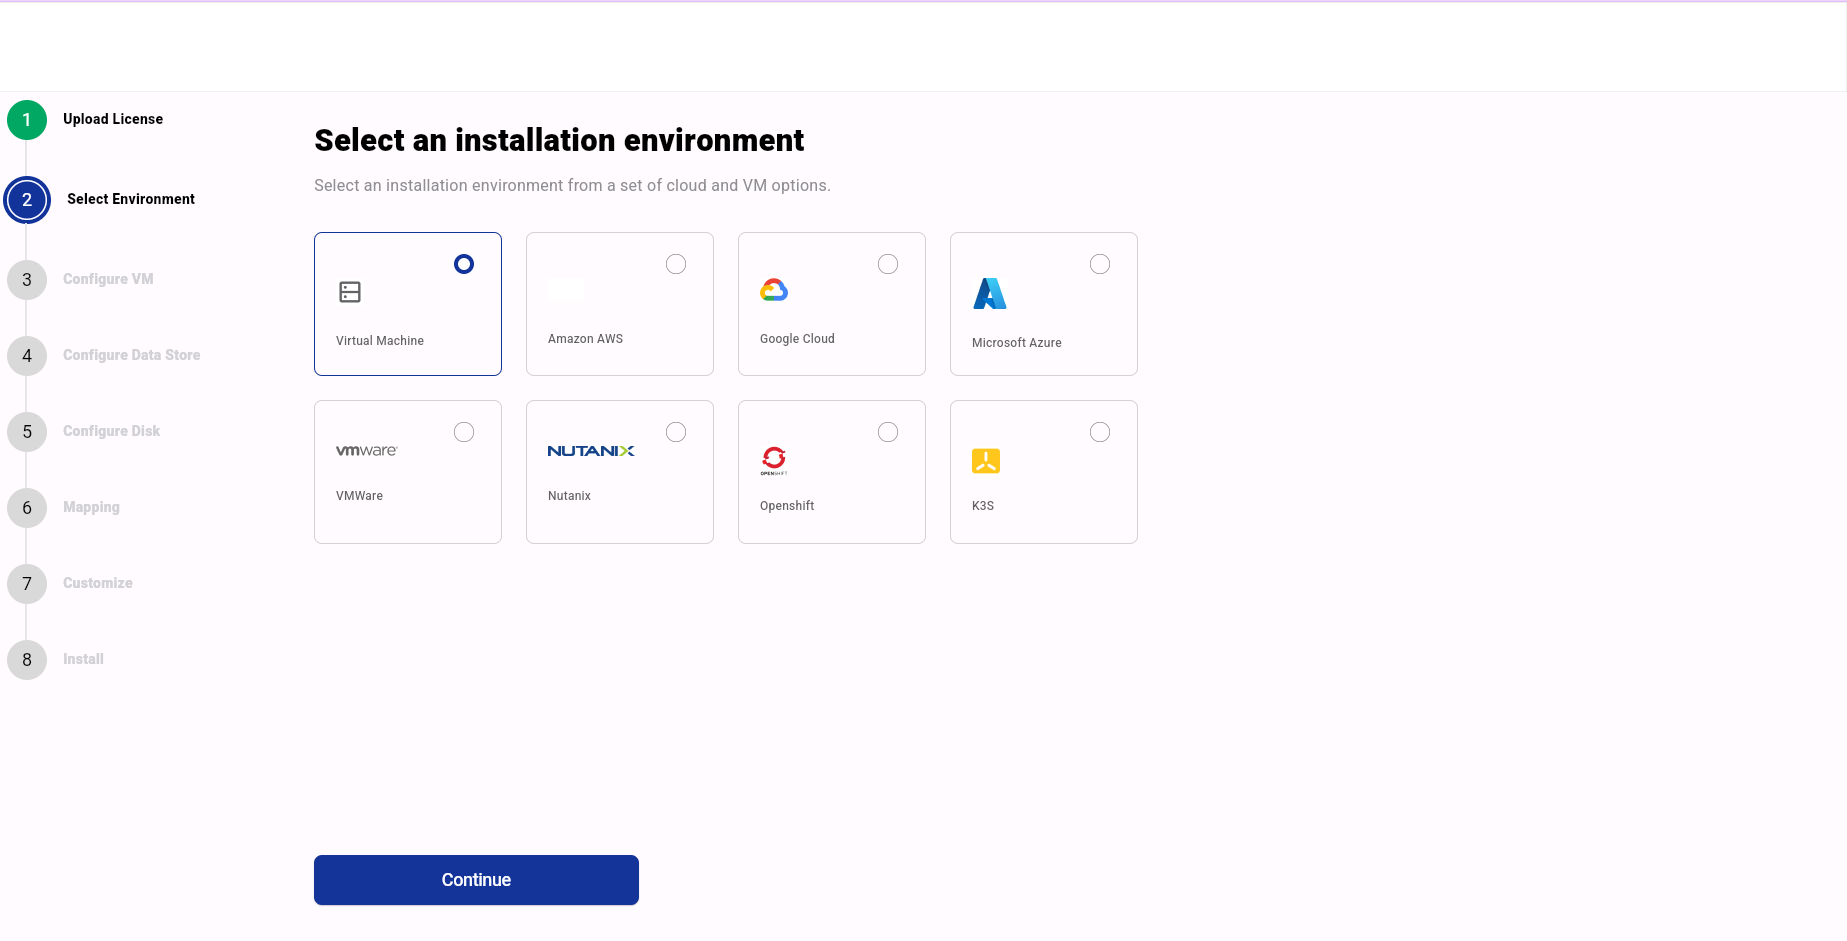
Installation Environment
- Here, you will be prompted to select your installation environment choice
- Currently, we only support the Virtual Machine Environment Type. Support for other environments are coming in the next phases.
- Click Virtual Machine and Continue Button.
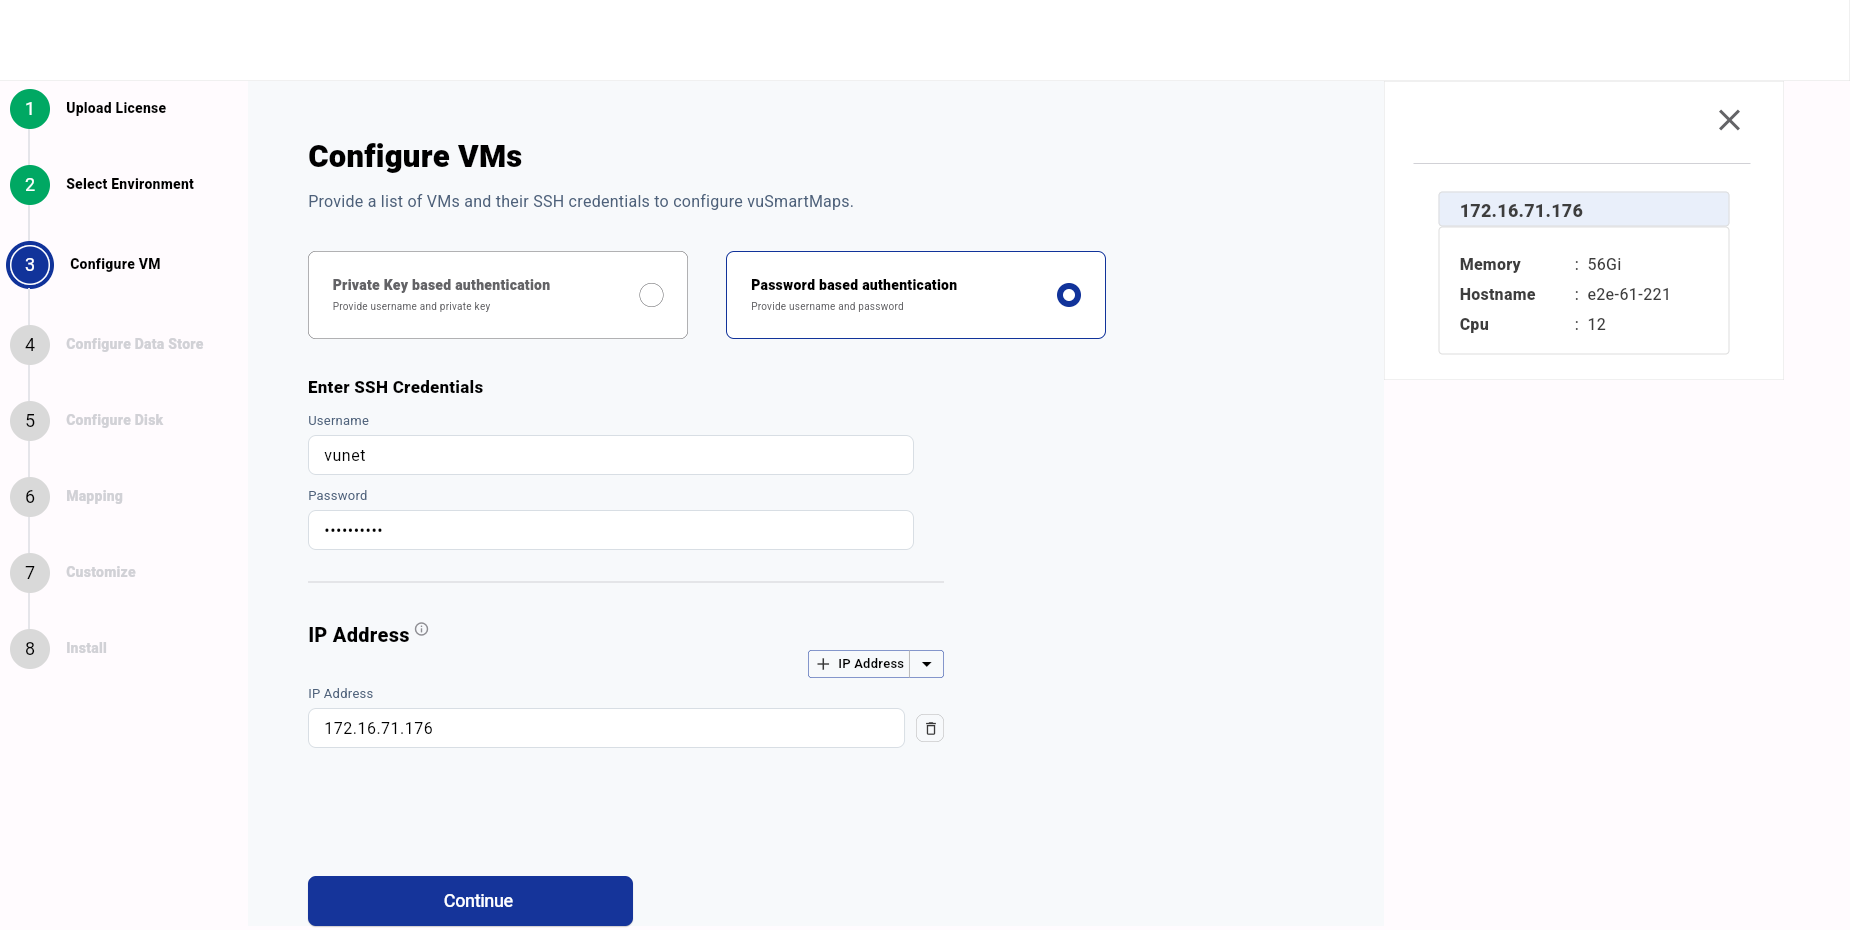
Configure VM
- Here you need to provide the VM Credentials. It is assumed that all the VMs have the same Credentials.
- There we support either private key or password-based authentication
- In the IP Address section. Add the Public IP address of the VM you want to install.
- After providing all the fields click Continue. The backend will verify if the credentials are valid, and try to allocate the services to the available VM. if it’s not possible, then a relevant error message will be prompted.
- If everything is successful, the metrics for the VM will be displayed on the right-hand side.
💡Note: The VM Credentials would be shared, along with the VM details.
- Provide all the VM Public IP details incase of multi node deployments.
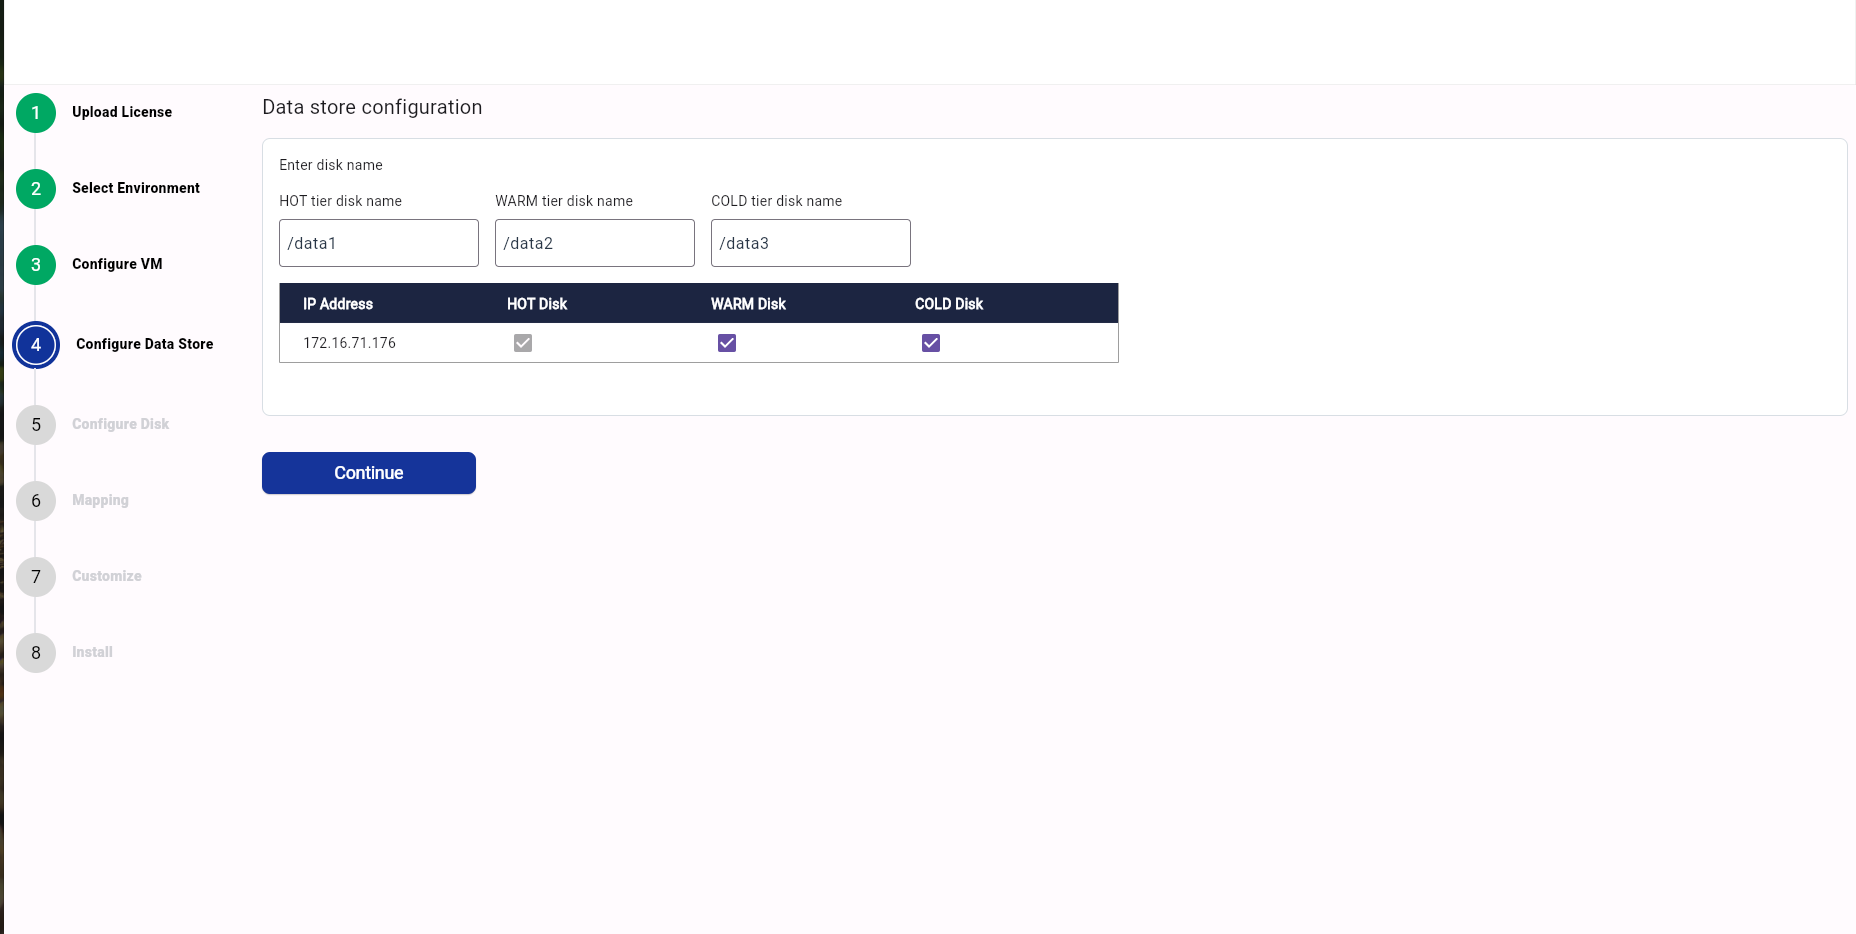
Configure Data Store
For Hyperscale data tier configuration, we have below options:
- Hot: Most frequently used data will be stored here, so preferably choose a storage class which has high Disk IOPS.
- Warm: We store data here which is not mostly accessed. So a default storage class would suffice.
- Cold: This is where we will store data for Archival purposes. We store this data in S3 bucket (Minio).
- In this step, we need to select the Nodes where we have the Hot, Warm, and Cold mounts available. And based on this section, the storage classes will be configured and used for storing data in the Hyperscale database.
- For Hyperscale, there would be 3 disk classes – Hot, Warm, and Cold (Archived Backups). Hot contains the most frequently accessed data(say Last 7 Days), Warm contains the data which is not accessed frequently(Say From 8th Day – 30th Day) and Cold disk will store all the archived data(Daily Table Backups). The DiskIOPs for Hot >> Warm >> Cold, Hence, the price for Hot Disk >> Warm Disk >> Cold Disk.
- Based on the requirements, choose the disk(s) required for the installation.
💡Note: HOT Disk should always be selected.
- In the case of multi node installation, select the Data Store configuration accordingly.
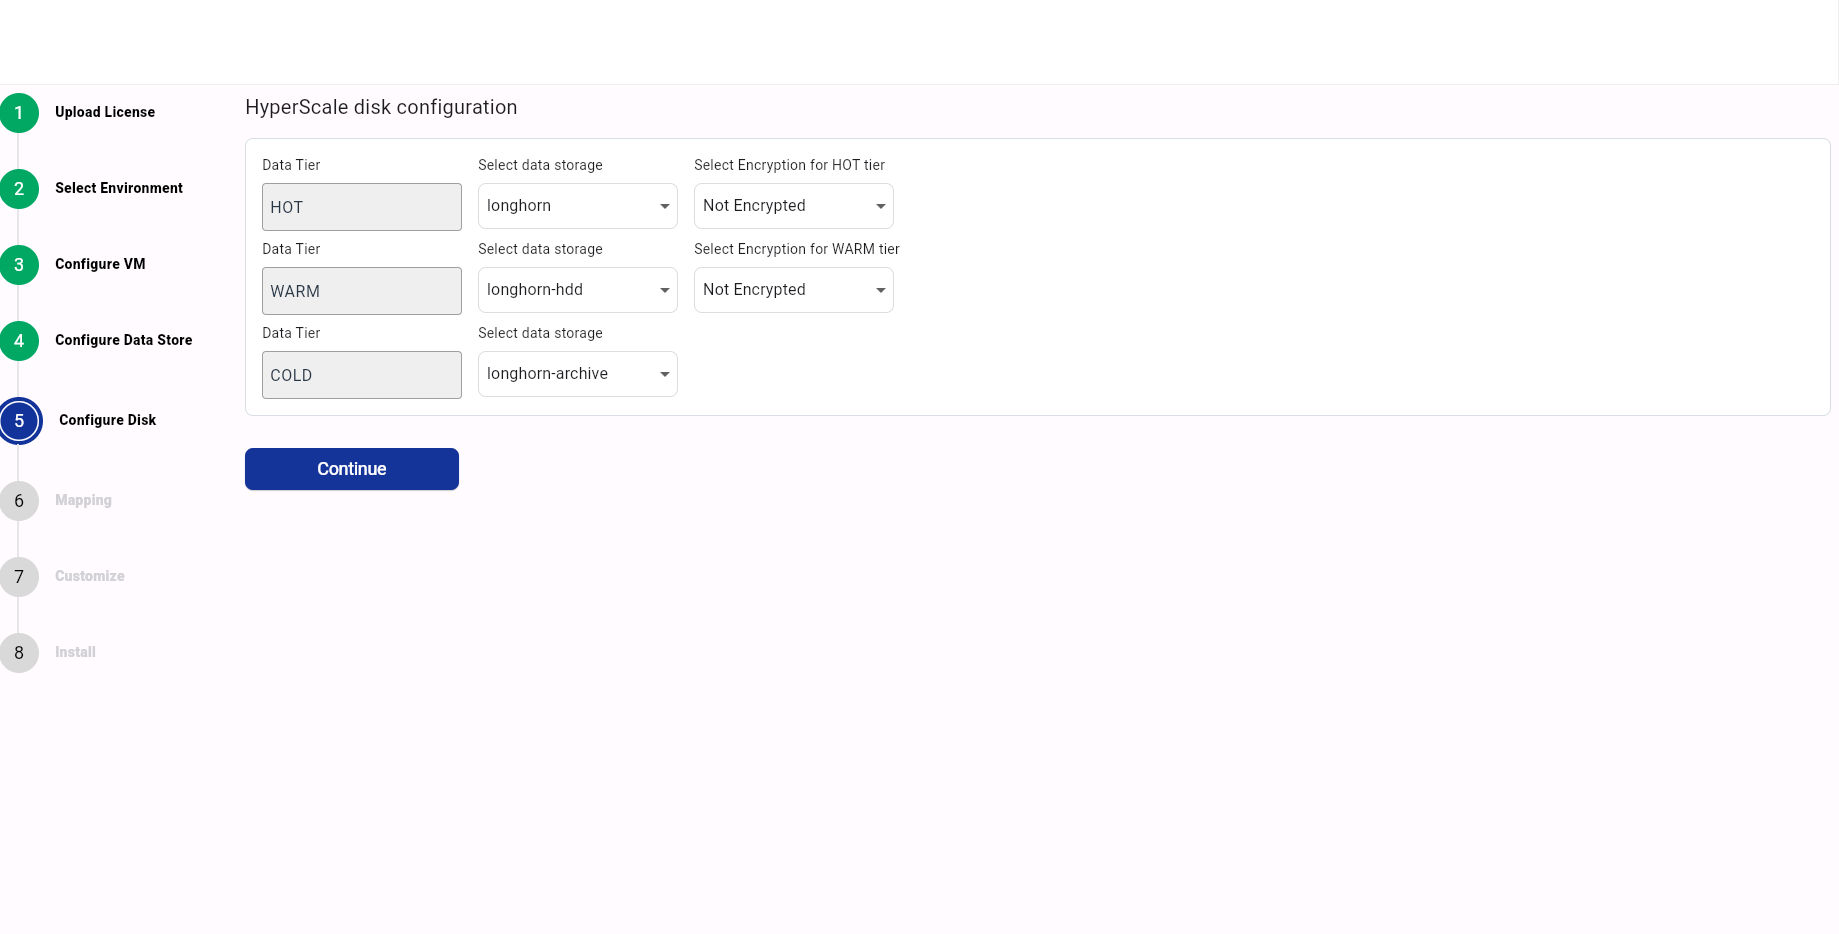
Configure Disk
Based on the previous step, 3 storage classes will be configured for each type of storage. Accordingly we need to assign the storage class and encryption setting for each disk.
💡Note: As of now we are not supporting encryption. So, select the Not Encrypted option here.
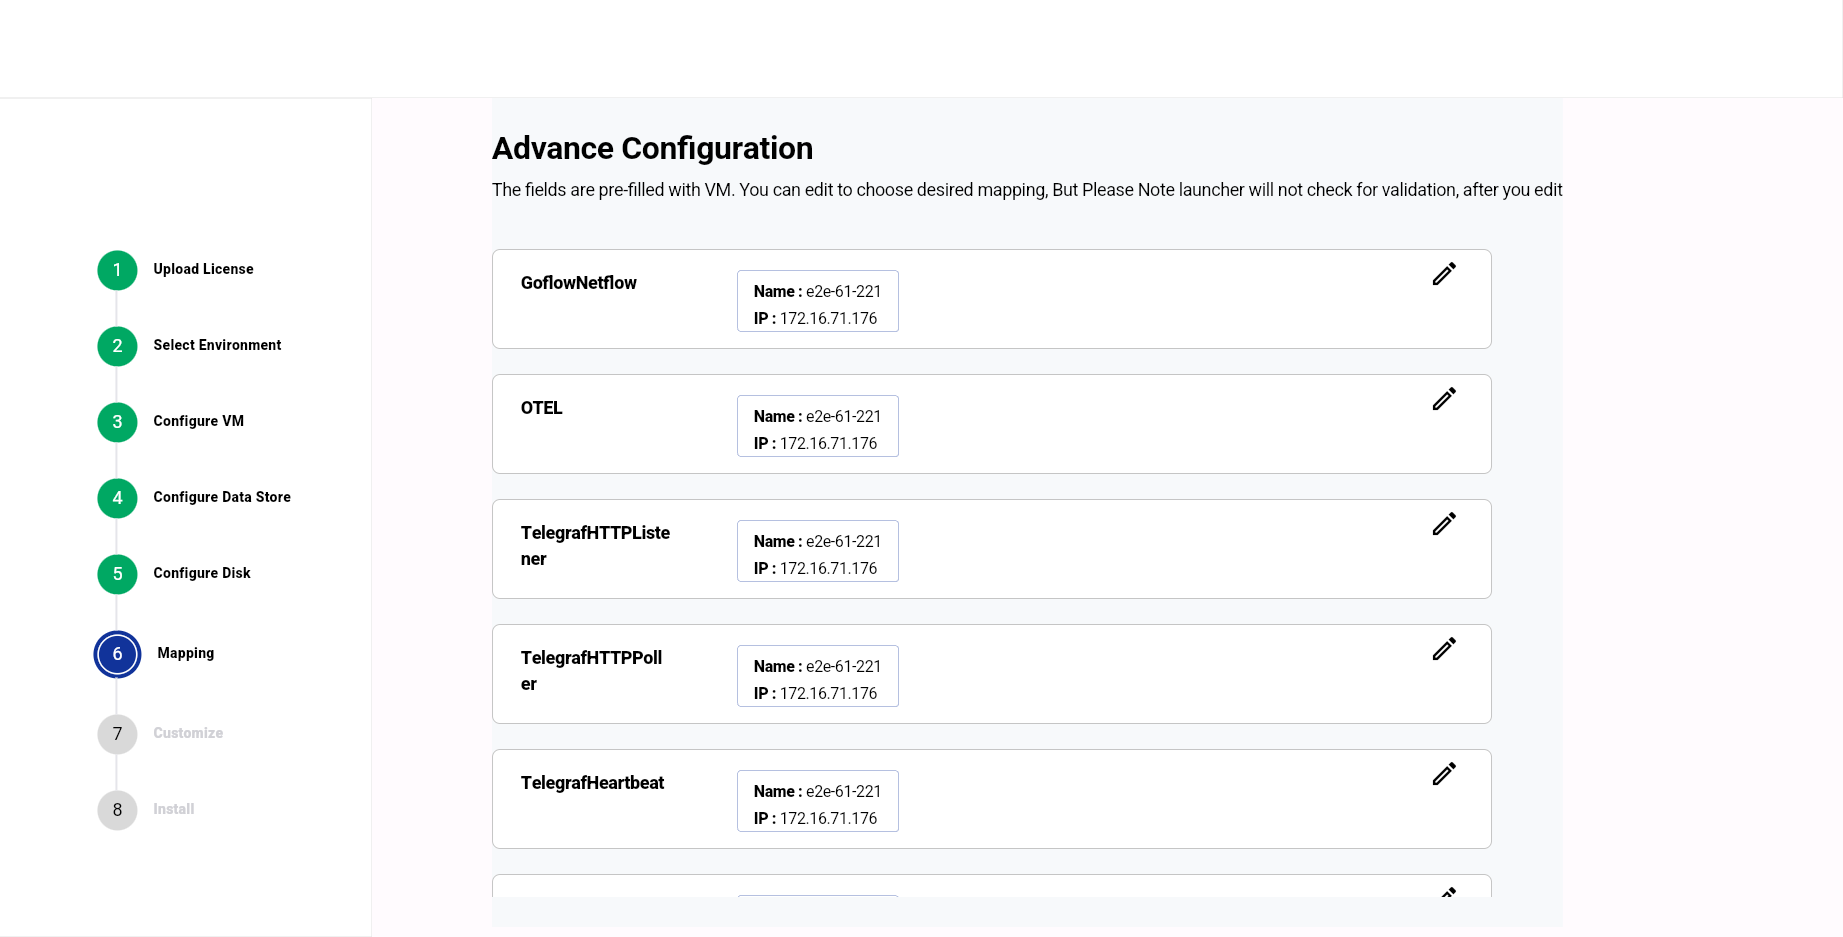
Mapping
VM to Service Mapping (with advanced Configuration)
- Here you can override the Service mapping to VM
- By default, the backend will allocate resources to the available VM in the best possible way. If a user wishes to override this allocation, they can do so on this page.
- If the user wishes to override, they can click the ‘Edit’ button. This will prompt them with a list of VMs, where they can increase or decrease the count as needed.
- In the Advanced Configuration section, choose the set of VMs for a service. If a VM goes down, then kubernetes will choose the given set of VMs to bring up this service. By default, all the nodes are chosen.

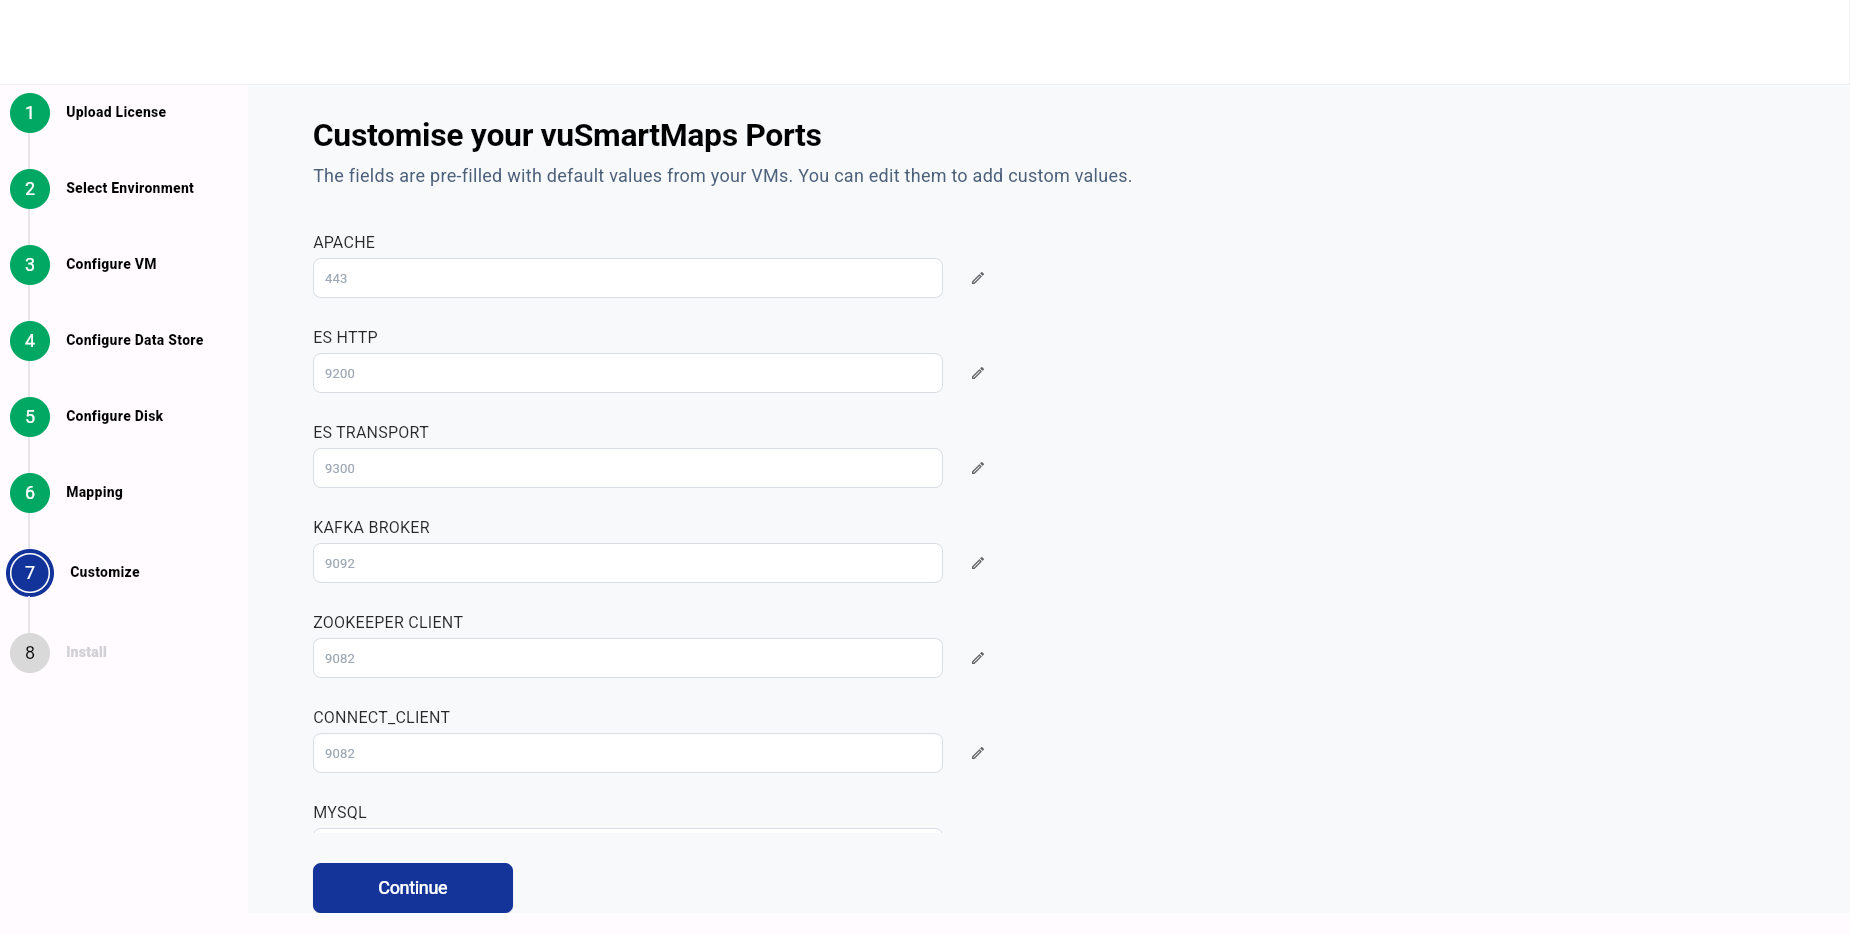
Customize
- Here users can override the port that the service uses.
- To override, click the edit button of the respective service, and then write the required port number
- Click Continue to proceed.
Install
- Here this page shows the summary of the information that the user provided.
- You can click the edit button on the details page, to move back to their respective section and override the change.
- You can also click the name of the stepper window to move.
- Then click Continue, to start the deployment procedure.
💡Note: Once you start the deployment, you cannot edit the configuration you provided.

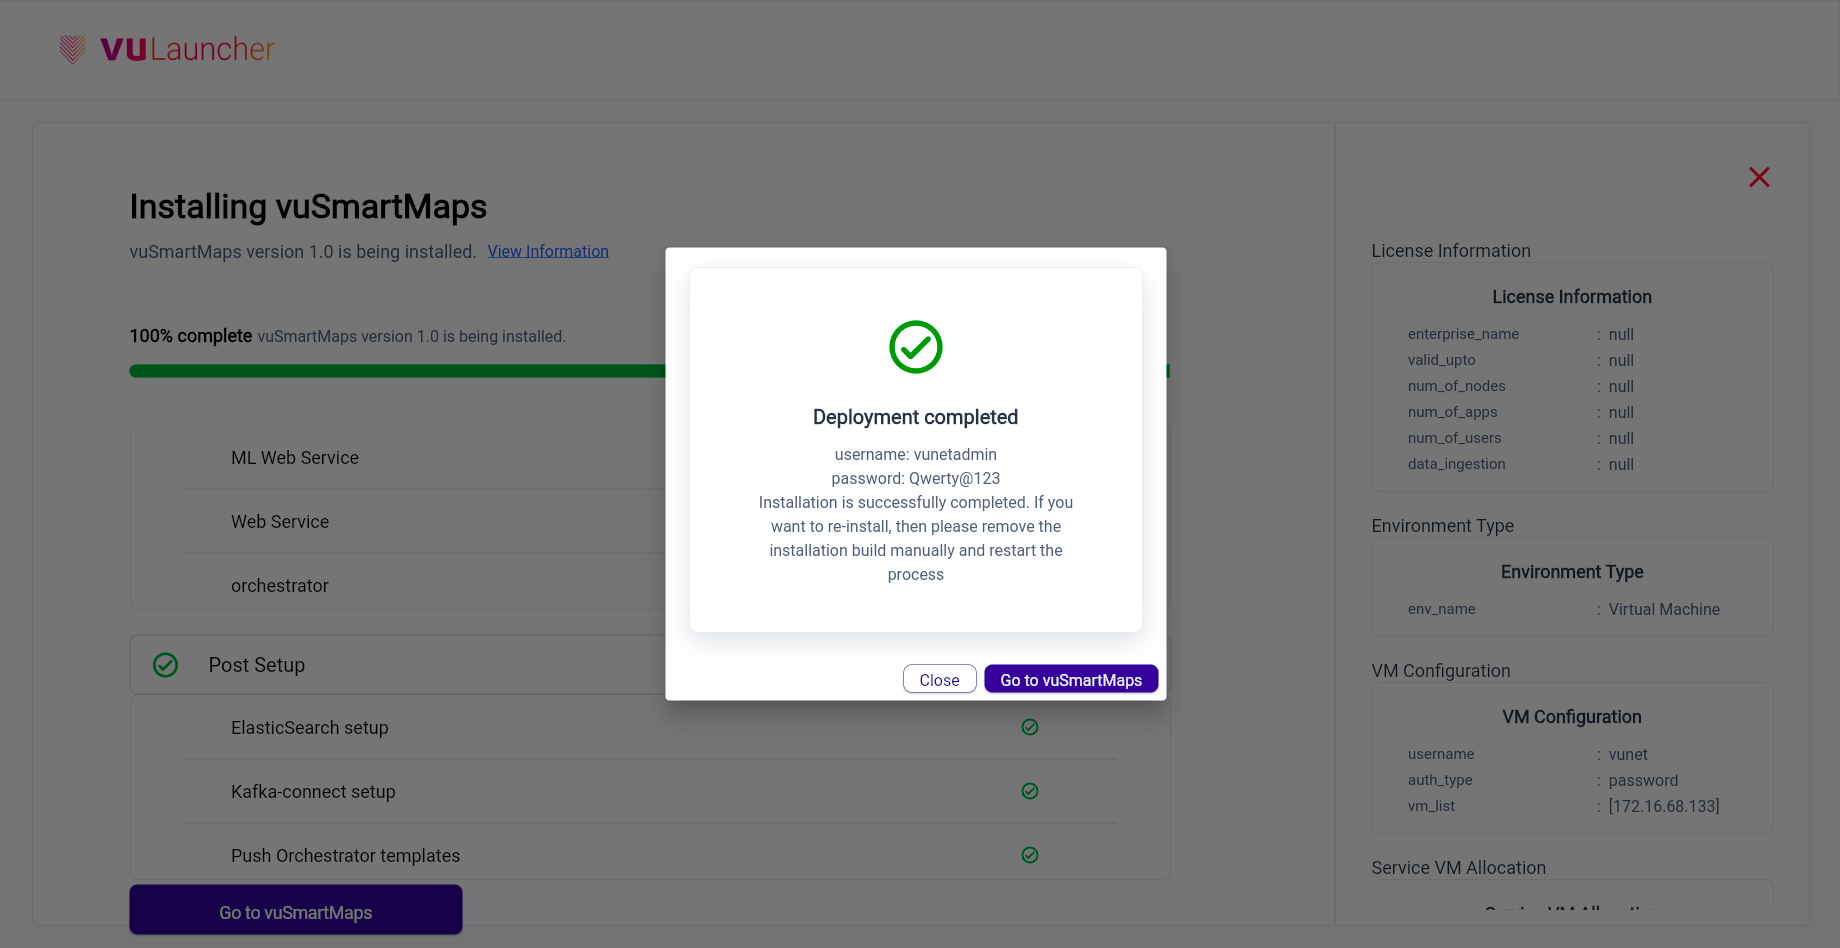
Installation Process
- The installation shows each event that is going to be performed.
- Users can click Cancel Installation to stop the ongoing installation. Additionally, they can retry if the process is halted or if the installation stops.

- Once the installation is successful, a prompt will open. Here, users can click Go to vuSmartMaps, and it will redirect to the vuSmartMaps login page.
- Use the Login credentials displayed here, to login to the UI.
Post Deployment Steps
Follow the below steps in the master node, once the deployment is successful.
- To find out which node is the master node, execute the following command in the node where the Kubernetes cluster is running. These details are provided during the initial deployment.
- kubectl get nodes -n vsmaps


In the above output, the e2e-69-187 node is the master node, since the Role is assigned as Master.
- Run the command below from the command line to access kubectl cli.
echo unset KUBECONFIG >> ~/.bash_profile
- Run the following command to own the kube config file
sudo chown -R vunet:vunet /etc/kubernetes/admin.conf
Upcoming Enhancements
Anticipate the following improvements in future releases:
- Enhanced UI experience.
- Log downloading in case of installation failure.
- Provision of an executable build instead of a tar file.
- Support for different authentication keys for each VM.
- Implementation of HTTPS security.
- Integration of fasthttp for improved performance.
Further Reading
Deployment On Existing Kubernetes Cluster


