WhatsApp Integration
Configuring Whatsapp Business API Account
This is a one-time configuration. Once this is configured and approved you can fetch the necessary information when needed.
Prerequisite: A dedicated phone number to be used as a WhatsApp sender number, which shouldn’t be linked to any WhatsApp account.
Creating a Business Account
- Visit Facebook Business Manager: Go to Facebook Business Manager, and if you're not already logged in, log in with your personal Facebook account.
- Create a Business Account: Click on the "Business Settings" option in the top right corner. Then, click on "Accounts" and select "Business Account." Follow the prompts to create a new business account.
- Business Verification (Optional): While verification is optional, it's recommended for added credibility. To verify your business, follow the instructions provided during the setup. You may need to provide business documents.
Not verifying your business might limit some functionalities, such as certain API access.
Logging into the Developer Console
- Access the Developer Console: Visit the Facebook for Developers website.
- Log in with Business Account: Click on "Log In" and use the Business Account credentials you just created to log in to the Developer Console.
Creating an App
- Access the Developer Dashboard: Once logged in, you'll land on the Developer Dashboard. If you don't see any existing apps, you can create one.
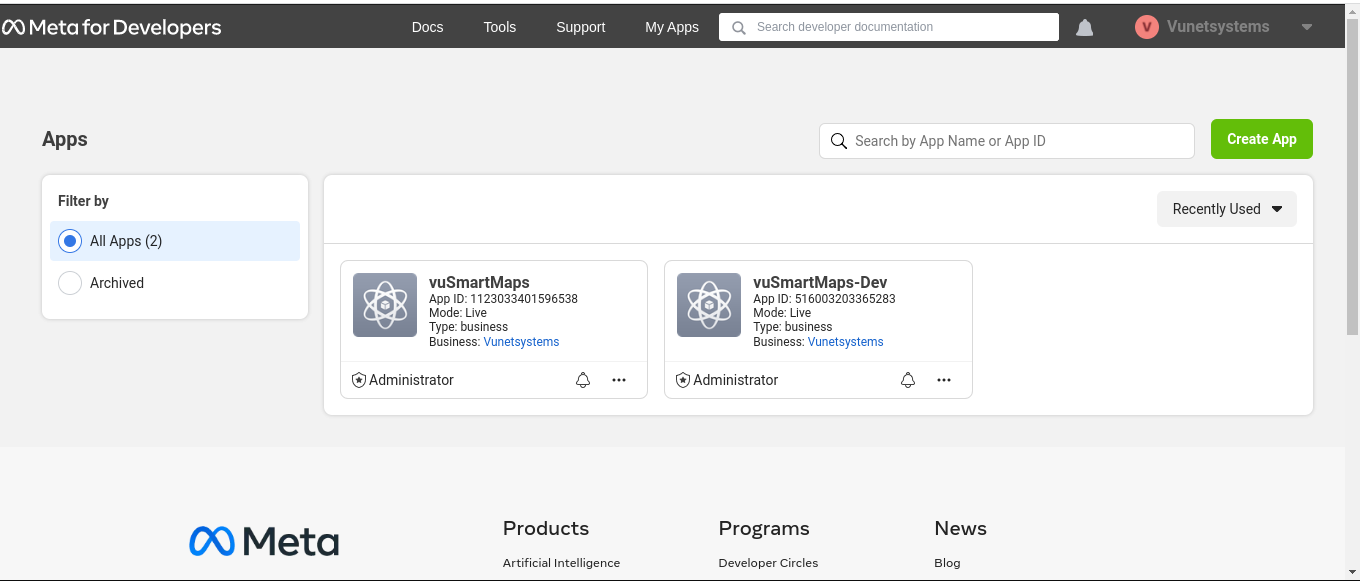
- Create a New App: Click on the "Create App" button. Follow the prompts to provide a display name, contact email, and other necessary details for your app.
Adding WhatsApp as a Product
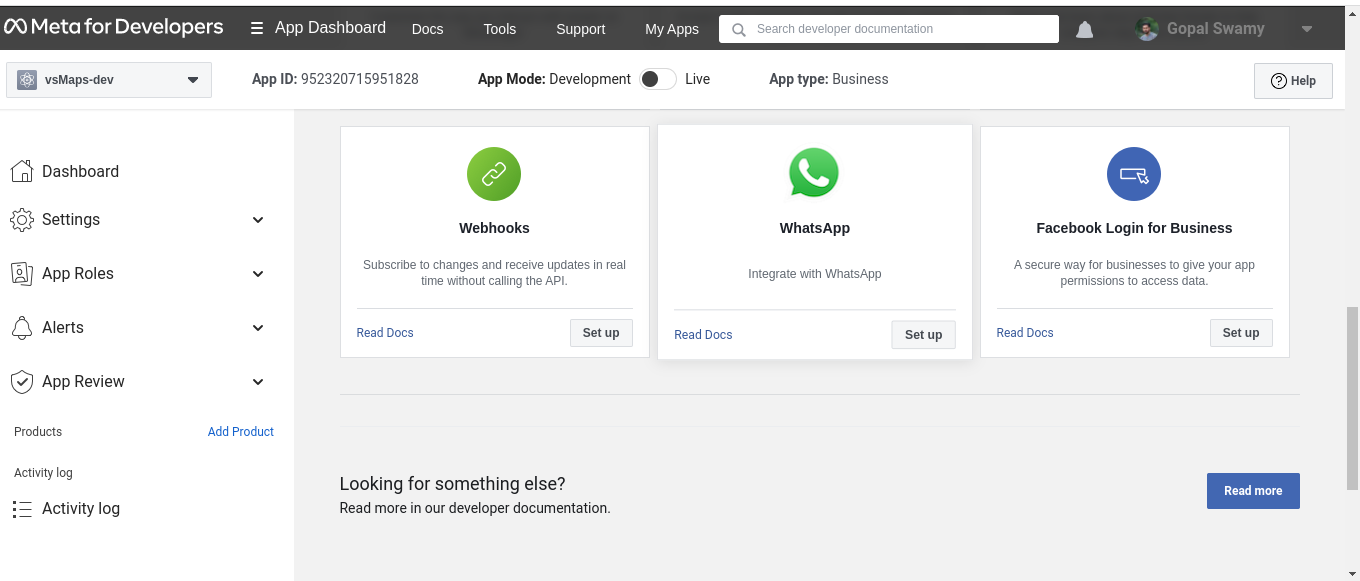
- Access the App's Dashboard: After creating the app, you'll be taken to its dashboard.
- Add a Product: On the left sidebar, click on "Products" and then click the "Set Up" button next to "WhatsApp." Follow the setup process, which may involve agreeing to terms and conditions.
Adding a Phone Number
Before proceeding to add payment details to your WhatsApp Business API setup, you need to register and verify a phone number. Here are the steps to add a phone number:
- Access WhatsApp Business API Dashboard: Log in to your WhatsApp Business API Dashboard using your Business Account credentials.
- Select Your WhatsApp Business API Instance: If you have multiple instances, select the instance for which you want to add a phone number. (https://business.facebook.com/settings/whatsapp-business-accounts/ )

- Navigate to Whatsapp Accounts: Look for a section or option in your instance dashboard related to "Whatsapp Accounts"
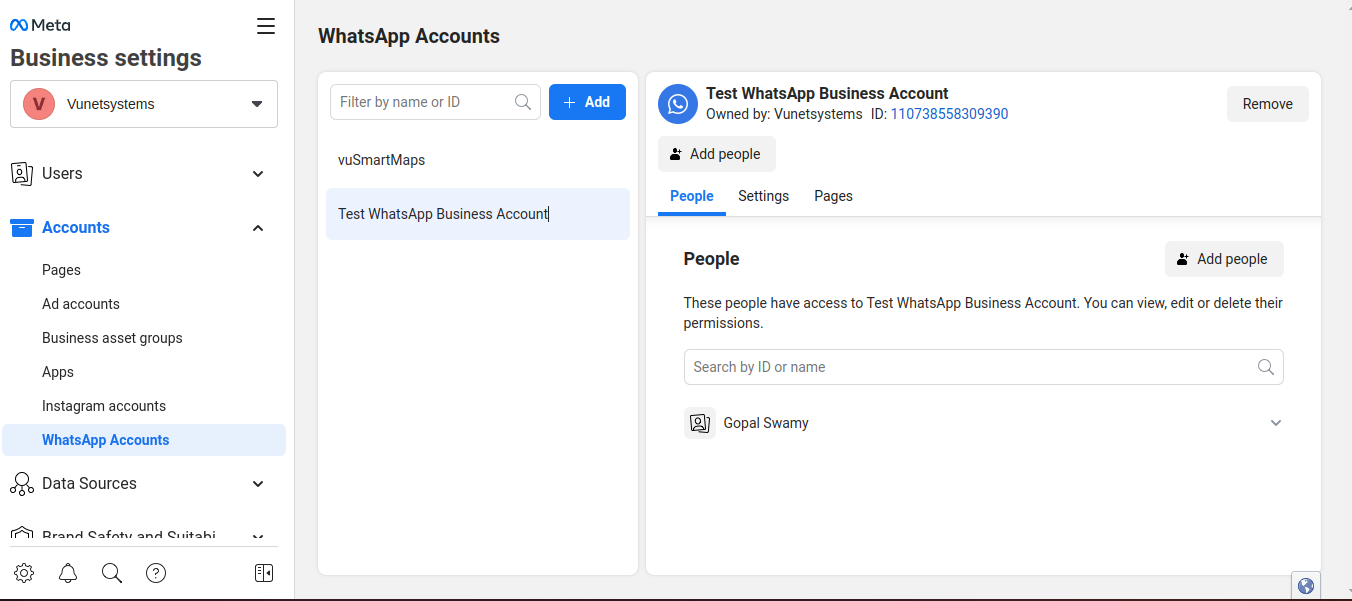
- Add a Phone Number: In the Whatsapp account section, you should see an option "Add" Click on it.
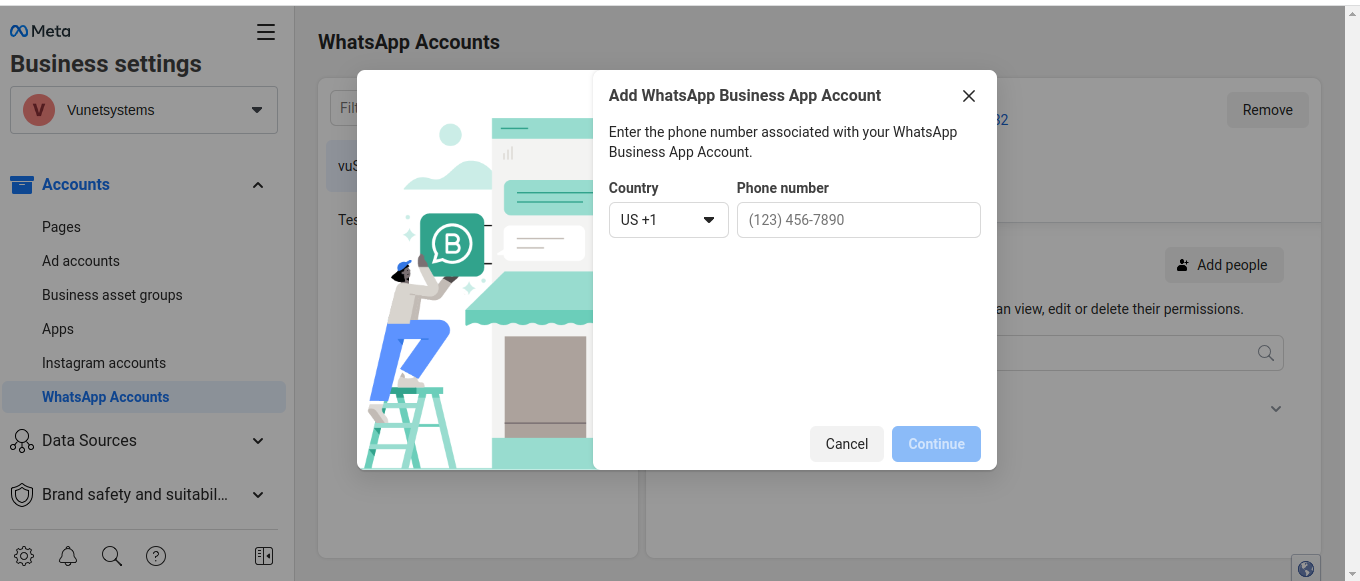
- Enter Phone Number Information:
- Provide the phone number you want to register for WhatsApp Business API.
- You have to choose the country code and enter the phone number without any spaces or special characters.
- Verification Process:
- WhatsApp will initiate a verification process to ensure the ownership of the phone number. This may involve receiving a verification code via SMS or phone call.
- Enter the verification code when prompted to verify the phone number.
- Phone Number Added:
- Once the verification is successful, WhatsApp will add the phone number to your WhatsApp Business API instance.
- Note the Phone Number ID:
- After adding the phone number, note down the associated Phone Number ID. This is an important identifier for your WhatsApp Business API configuration and integration.
- Ensure that you copy the Phone Number ID to a secure location, as you will use it in your API integration code. Treat this ID as sensitive information and do not expose it publicly.
Adding Payment Details in Account Information
- Navigate to Account Information: In the Developer Console, click on the account icon in the top right corner and select "Account Settings."
- Update Payment Method: In the "Account Information" section, you'll find "Payment Method." Click "Edit" to add or update your payment information. This is important for billing related to WhatsApp API usage.
Creating and Managing Templates
- Access the WhatsApp Manager: In the Developer Console, go back to your app's dashboard.
- Open WhatsApp Manager: Under "Products" in the left sidebar, click on "WhatsApp." Then, click on "WhatsApp Manager." (https://business.facebook.com/wa/manage/message-templates/ )
- Manage Templates: In the WhatsApp Manager, you can create and manage message templates. Click on "Message Templates" to create new templates or manage existing ones.
- Create Templates: To create a template, click on the "Create Message Template" button. Fill in the required details, including the template name, language, and message content. Make sure your templates comply with WhatsApp's guidelines.
- Submit Templates for Approval: After creating templates, you'll need to submit them for approval. WhatsApp will review and approve them if they meet the criteria.
- Use Approved Templates: Once approved, you can use these templates to send alert messages via the WhatsApp Business API.
Generating a Permanent Access Token
We recommend that you use system user access tokens to access the Business Management API and Cloud API. Generate a System User access token after creating a system user
- Sign in to the Meta Business Suite.
- Locate your business account in the top-left dropdown menu and click its Settings (gear) icon.
- Click Business settings.
- Navigate to User > System users.
- Select the appropriate system user from the list of system users.
- Create a system user if not present
- Click the Generate new token button.
- Select the app that has been configured for WhatsApp API access.
- Necessary permissions are added to the token by default by selecting the app in the previous step and generating the token.
Since this token does not expire, it is critical to store it securely.
Creating Message Payload
There are a few types of messages WhatsApp supports, you only need text-based template messages.
Creating Message Payload in general
Creating a payload for a text-based template message using the WhatsApp Business Cloud API involves specific JSON formatting and considerations. Below is a simplified guide on how to structure a payload for a text-based template message for WhatsApp Business Cloud API. Please note that this is a general example, and you should consult the official WhatsApp Business API documentation for the most up-to-date information and specific requirements:
{
  "message": {
    "product": {
      "product_code": "your_product_code",
      "type": "PRODUCT"
    },
    "template": {
      "name": "your_template_name",
      "language": {
        "policy": "deterministic",
        "code": "your_language_code"
      },
      "namespace": "your_namespace",
      "components": [
        {
          "type": "BODY",
          "parameters": [
            {
              "type": "text",
              "text": "Your text-based template message goes here."
            }
          ]
        }
      ]
    }
  }
}
Here's a breakdown of the components in this WhatsApp Business Cloud API payload:
- "product": Specifies the product associated with the message, including the product code and type (typically "PRODUCT").
- "template": Contains details about the template message.
- "name": Your template's name or identifier.
- "language": Describes the language settings for the template.
- "policy": Language policy ("deterministic" for predefined templates).
- "code": Language code for the template.
- "namespace": Namespace for your template.
- "components": Contains the components of your template message.
- "type": Type of component ("BODY" for the main message body).
- "parameters": Parameters for the component.
- "type": Specifies the type of parameter (in this case, "text" for text-based content).
- "text": The actual text content of your text-based template message.
Replace the placeholders such as your_product_code, your_template_name, your_language_code, your_namespace, and Your text-based template message goes here. with your specific information and message content.
Creating Payload for vuSmartMaps
Consider the template in the image below as the one configured and approved by WhatsApp.
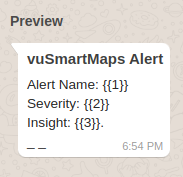
In this template {{1}} {{2}} & {{3}} are placeholders for which whatsapp expects you to send the appropriate data for you to send the message.
For these placeholders, if you create a payload as mentioned in the “Creating Message Payload in general” section, it looks like the below one
[
 {
   "template_name": "Sample Template",
   "template_detail": {
     "messaging_product": "whatsapp",
     "type": "template",
     "template": {
       "name": "vualert",
       "language": {
         "code": "en"
       },
       "components": [
         {
           "type": "body",
           "parameters": [
             {
               "type": "text",
               "text": "Enter_Your_Alert_Name_Here"
             },
             {
               "type": "text",
               "text": "Enter_Your_Severity_Value_Here"
             },
             {
               "type": "text",
               "text": "Enter_Your_Insight_value_Here"
             }
           ]
         }
       ]
     }
   }
 }
]
In the payload above Enter_Your_Alert_Name_Here, Enter_Your_Severity_Value_Here, Enter_Your_Insight_value_Here need to be substituted with appropriate Data.
You can test if this payload is working as expected, by testing it using PostMan or Curl.
This Data is going to be substituted from the values from the alert document, consider the alert document below.
{
    "Alert-Rule-Name": "High_CPU_Usage_Alert",
    "doc_type": "alert",
    "tenant_id": "1",
    "bu_id": "1",
    "timeToDetect": 300.0,
    "severity": "critical",
    "level": "1",
    "Type": "CPU_Usage",
    "description": "The CPU usage has exceeded 90% for a sustained period of time.",
    "summary": "High CPU Usage Detected",
    "R1": {
        "M1": {
            "label": "CPU Usage",
            "type": "number",
            "value_for_eval_duration": "95",
            "formatted_value_for_eval_duration": "95%",
            "color": "#dd171d",
            "insights": "Need immediate attention! CPU usage is critically high.",
            "matched_threshold": "> 90"
        },
        "status": "Unavailable",
        "name": "Server001"
    },
    "tags": [
        "Infrastructure",
        "CPU",
        "Critical"
    ],
    "group_label": "High_CPU_Alerts",
    "timestamp": "2023-10-03 09:15:00",
    "Day": "Monday",
    "@timestamp": "2023-10-03T09:15:00.000Z",
    "Alert-Rule-Evaluation-Duration": "5 Minutes",
    "Enterprise Name": "YourCompany Inc.",
    "active_period_execution": true,
    "alert_id": "987654321",
    "alarm_state": "Triggered",
    "start_time": "2023-10-03T09:15:00.000Z",
    "type": "CPU_Usage_Alert",
    "index_prefix": "yourcompany-12345-cpu-alerts"
}fix": "yourcompany-12345-cpu-alerts"
}
Considering the alert document above, you can substitute the values Enter_Your_Alert_Name_Here, Enter_Your_Severity_Value_Here, Enter_Your_Insight_value_Here in the payload create above with template variables {{Alert-Rule-Name}}, {{severity}} and {{R1>M1>insights}}. (Refer to How to create template variables from alert doc under the SMS message creation section of User Guide).
Now the Final Template to configure in the vuSmartMaps will look like the below:
[
 {
   "template_name": "Sample Template",
   "template_detail": {
     "messaging_product": "whatsapp",
     "type": "template",
     "template": {
       "name": "vualert",
       "language": {
         "code": "en"
       },
       "components": [
         {
           "type": "body",
           "parameters": [
             {
               "type": "text",
               "text": "{{Alert-Rule-Name}}"
             },
             {
               "type": "text",
               "text": "{{severity}}"
             },
             {
               "type": "text",
               "text": "{{R1>M1>insights}}"
             }
           ]
         }
       ]
     }
   }
 }
]
Creating Advanced Configuration
The Advanced Configuration YAML file contains two main categories of values:
Parameters for Transforming the Payload
These parameters help modify and structure the payload before sending it. There are three types:
-
Static Field Map: Adds or updates key-value pairs in the payload without modification.
- Example: Defining
orgId: "vunetId"in the YAML results in a payload like:{"orgId": "vunetId"}
- Example: Defining
-
Payload Value Map: Dynamically inserts or updates values by referencing fields from
alert_doc, including nested structures.- Example: To generate a payload like:
{"fields": {"summary": alert_doc["description"]}} - Define it in YAML as:
fields.summary: description
- Example: To generate a payload like:
-
Payload Key Map: Renames existing keys in the payload while preserving its structure.
- Example: If the payload is:
{"fields": {"summary": alert_doc["description"]}} - "summary" needs to be renamed to "description", define it as:
fields.summary: fields.description
- Example: If the payload is:
-
Delete Key Map: Delete existing keys in the payload while preserving its structure.
- Example: If the payload is:
{"orgId": 123} - "apiKey" needs to be deleted, define it as:
orgId
- Example: If the payload is:
User Credentials for the Script
The YAML can also include a list of credential names stored in definitions, allowing the script to access them when needed.
Example YAML Configuration:
credentials:
  - apiKey

static_field_map:
  orgId: "vunetId"
  severity: "low"

payload_value_map:
  fields.summary: description

payload_key_map:
  fields.summary: fields.description

delete_keys:
orgId

custom_headers:
Apikey: sdqe2343sdfnklqweqwere
This structure ensures that credentials, static values, dynamic mappings, and key transformations are properly defined for seamless payload customization.
Creating Payload Configuration Script
The Payload Configuration Script allows users to define a Python script to create custom payloads and headers for sending WhatsApp messages. This feature is available when the WhatsApp API Type is set to Custom in the settings.
With this script, users can:
- Programmatically generate payloads and headers.
- Customize message formats based on dynamic conditions.
- Return either:
- A single payload and header.
- A list of payloads with corresponding headers.
- If headers are not specified, they default to None.
When to Use the Payload Configuration Script
- When the WhatsApp channel is triggered, an API call is made to the specified endpoint. By default, headers are set based on the authentication type, and the payload remains empty if the WhatsApp API Type is set to Custom.
- If users need advanced logic to build the payload using data like preferences, credentials, system information, alert details, and phone numbers, they should use the Payload Configuration Script. The script can override default payloads and headers defined in the YAML file.
Writing the Script
-
Prerequisites:
- Basic knowledge of Python, including variables, dictionaries, lists, loops, and functions, is required. Additionally, familiarity with the WhatsApp API and alert configurations is essential.
-
Script Requirements:
- The script must be written in Python with proper indentation to ensure clarity and maintainability. The final output should be assigned to
VALUE['request_details']. No imports are needed, as all necessary Python libraries are pre-supported.
- The script must be written in Python with proper indentation to ensure clarity and maintainability. The final output should be assigned to
Accessing Data in the Script
The script can access various dynamic dictionaries and lists to generate payloads and headers:
- Preferences: Holds WhatsApp API configuration details. Defaults to None if not provided.
- Example:
{
  "whatsapp_api_type": "Custom",
  "endpoint": "https://api-stage.corover.ai/alert/whatsapp/push",
  "auth_type": "basic_auth",
  "template_details": "...",
  "config_yaml": "credentials:\n  - apiKey",
  "username": "guestuser1",
  "password": "test_pass"
}
- Phone Numbers: A list of recipient phone numbers. Defaults to an empty list
[]if none are provided.- Example:
["+918755273773", "+918868073773"]
- Alert Document: Contains information about the alert that triggered the API call.
- Example:
{
  "Alert-Rule-Name": "High_CPU_Usage_Alert",
  "severity": "critical",
  "description": "CPU usage exceeded 90%.",
  "timestamp": "2023-10-03T09:15:00.000Z",
  "alert_id": "987654321",
  "Enterprise Name": "YourCompany Inc."
}
- System Information: Provides system-related details like platform, version, and other attributes.
- Example:
attribute_names = [
       "argv",
       "float_info",
       "int_info",
       "maxsize",
       "maxunicode",
       "stdin",
       "stdout",
       "stderr",
       "base_exec_prefix",
       "base_prefix",
       "exec_prefix",
       "executable",
       "prefix",
       "builtin_module_names",
       "modules",
       "path",
       "flags",
       "ps1",
       "ps2",
       "byteorder",
       "dllhandle",
       "platform",
       "thread_info",
       "copyright",
       "hexversion",
       "implementation",
       "version",
       "version_info",
       "winver",
   ]
- Credentials: Lists credentials available in the YAML configuration.
- Example:
[
  {"apiKey": {"name": "apiKey", "user_name": "apiKey", "password": "test_key"}},
  {"access_token": {"name": "access_token", "access_token": "apiKey", "password": "test_token"}}
]
- Base Payload: Contains the base structure of the payload, defaulting to
{}if not defined.
Sample Script
Here’s a sample script that generates payloads and headers based on alert severity:
result = []
if not phone_numbers:
    phone_numbers = ['+91875273773']

for phone in phone_numbers:
    base_payload["phone_number"] = phone

    header = {
        "Authorization": f"Bearer {credentials[0]['apiKey']['password']}",
        "Content-Type": "application/json"
    }

    result.append({
        'payload': base_payload,
        'headers': header
    })

VALUE['request_details'] = result
Key Considerations
VALUE['request_details']must contain:- A valid dictionary:
{"payload": {...}, "headers": {...}} - A valid list:
[ {"payload": {...}, "headers": {...}}, {...}]
- A valid dictionary:
- Proper Indentation: Ensure correct formatting since syntax validation is not supported.
- Testing the Script:
- Write and test the script locally in a Python editor like VS Code or PyCharm.
- Paste it into the configuration editor after validation.
- No Imports Required: All necessary libraries are pre-supported.
FAQs
What should be checked if WhatsApp alerts are not being sent?
Ensure Phone Number ID, Access Token, and Template JSON Payload are correctly set in WhatsApp Configurations. Use the Test button to confirm.
How can I configure WhatsApp with Meta’s official API?
Create a WhatsApp Business account, register a phone number, and generate a permanent access token. Then, set up the Phone Number ID and message templates in vuSmartMaps.
