vuSmartMaps Homepage
The vuSmartMaps homepage is the introductory landing page of the platform, accessible from the vuSmartMaps tab. It consists of two sections:
- Customer Service Panel
- Recently Viewed Pages
The homepage plays a crucial role in the vuSmartMaps platform for several reasons. It serves as the control panel for the platform that addresses the needs of the solution, operation, and business team. The main menu access will be restricted based on the user roles. The user with the admin role has complete access to the menu navigation. Additionally, it provides a link to the user guide and tutorials, making it a valuable resource for users to learn how to use the platform effectively.
End users need to contact the administrator to get additional access.
Overall, the homepage is essential for users of vuSmartMaps as it offers a centralized hub for platform navigation and access to helpful resources.
Accessing the Homepage
- To access the Homepage navigate to the Left Navigation menu-> App-> vuSmartMaps.
- On clicking the vuSmartMaps tab, you will be redirected to the following landing page.

Left Navigation Menu
If you click on the "Toggle Menu" at the top left, you will see a list of menu items. By clicking on any of them separately, you will be navigated to the menu or page based on your selection. It allows for quick access to different menus or features.
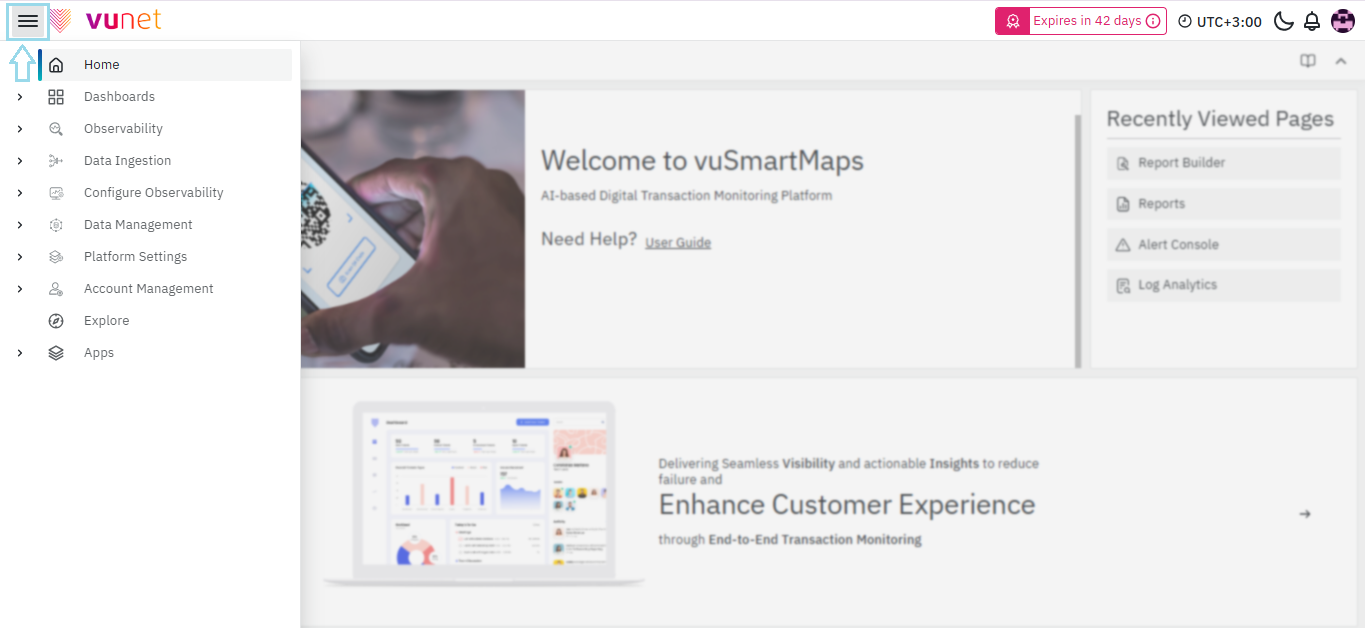
Following are the features listed under the Left Navigation menu and their dropdown:
- Home
- Dashboards
- Playlists
- Snapshots
- Library panels
- Observability
- Alert Console
- Log Analytics
- Reports
- RCA Incidents
- Data Ingestion
- 011ySources
- ContextStreams
- Data Enrichment
- Import Data
- Data Extraction
- Configure Observability
- Data Modelling Workspace
- Alert
- Reports Builder
- RCA Workspace
- Unified Transaction Map
- Insights
- Mobile Dashboards
- Notification Management
- Data Management
- Data Source
- Data Retention
- Data Storage
- Platform Settings
- Definitions
- Configurations & Preferences
- Resource Management
- User Federation
- Plugins
- Service Accounts
- Account Management
- User Management
- License Management
- About
- Explore
- Apps
- vuSmartMaps
- vuCoreML
- vuLogDna
License Expiry Indicator
- The license expiry indicator becomes visible 90- days before the License expiry. It is visible at the top bar on the right-hand side.
- When you click on the indicator, a pop-up will appear to show a more detailed view.
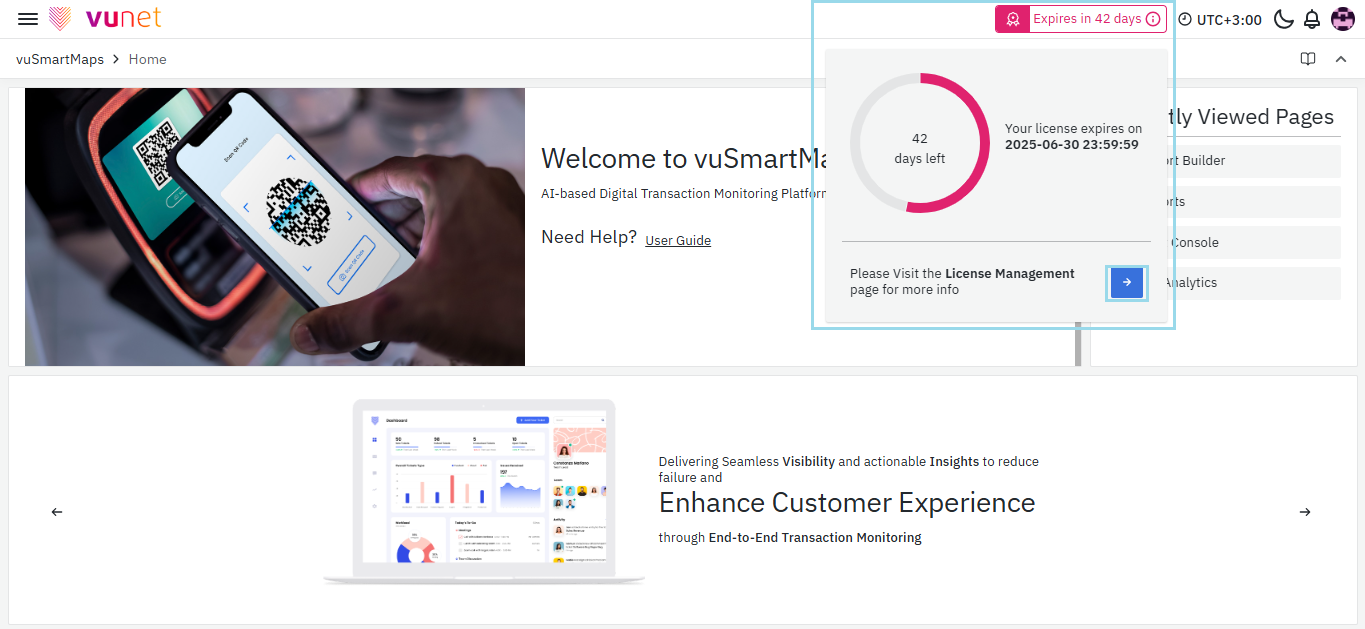
- The indicator employs a color-coded system for efficient expiry management. When there are 45 or fewer days until expiry, it turns amber, signaling urgency. The indicator adopts a yellow color for a moderate level of urgency when there are 46 to 90 days until expiry. Stay informed and act promptly based on these visual cues.
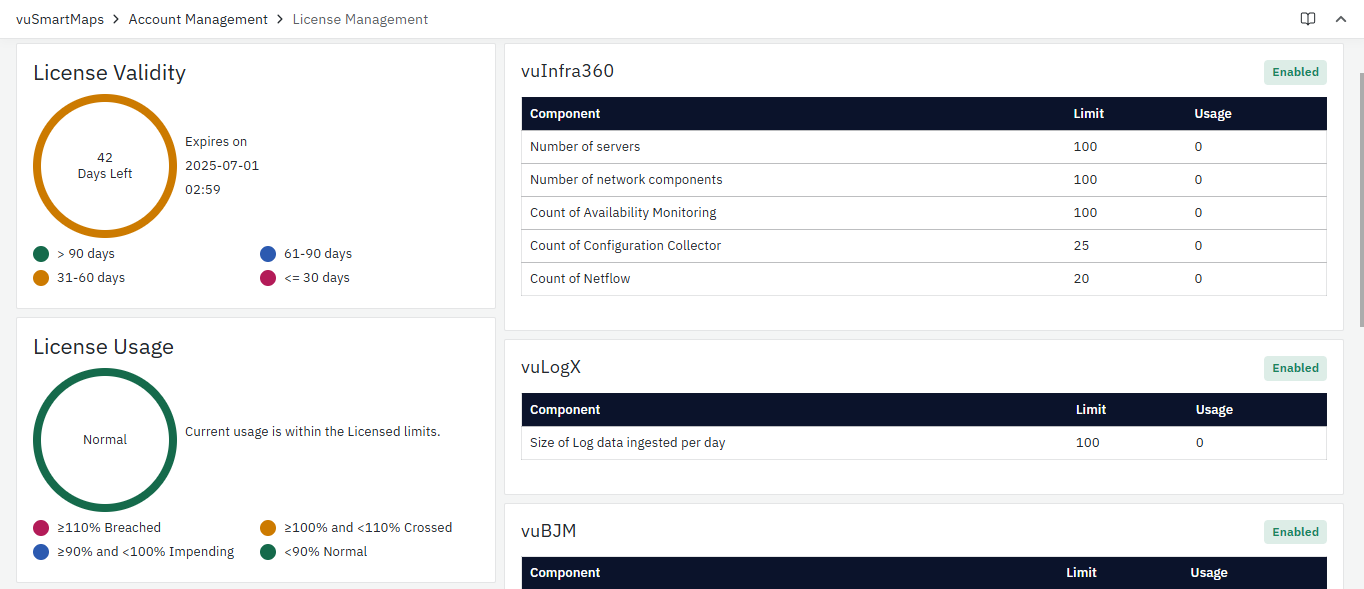
- Clicking the blue arrow on the pop-up will navigate you to the License Management Page.
- License Management in vuSmartMaps: Control, monitor, and access critical licensing details and settings seamlessly through the dedicated tab. For more information, refer to the License Management.
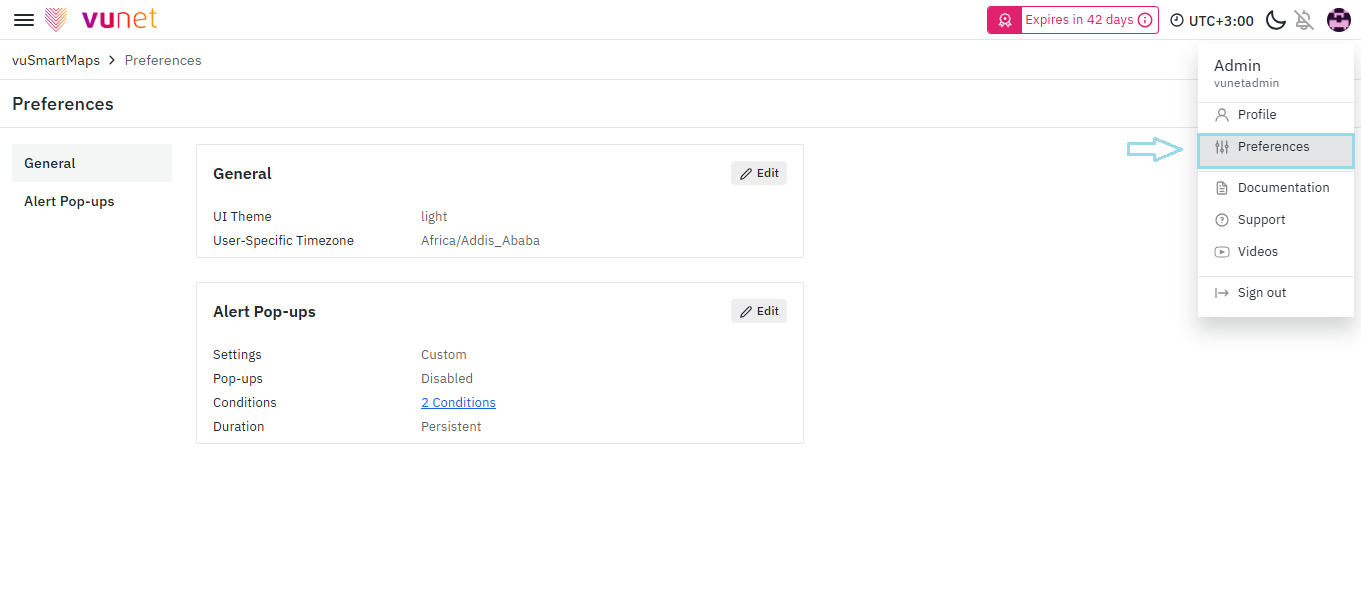
User Specific Timezone
- The User-Specific Timezone icon at the top right displays the timezone set by the user in their profile.
- You can change this timezone by navigating to the Preferences section.
Select your desired timezone from the User Specific Timezone dropdown menu, then click Save. The system will update to reflect the chosen timezone.
By default, the user-specific timezone will be set to the 'Default' timezone, but users can change it.
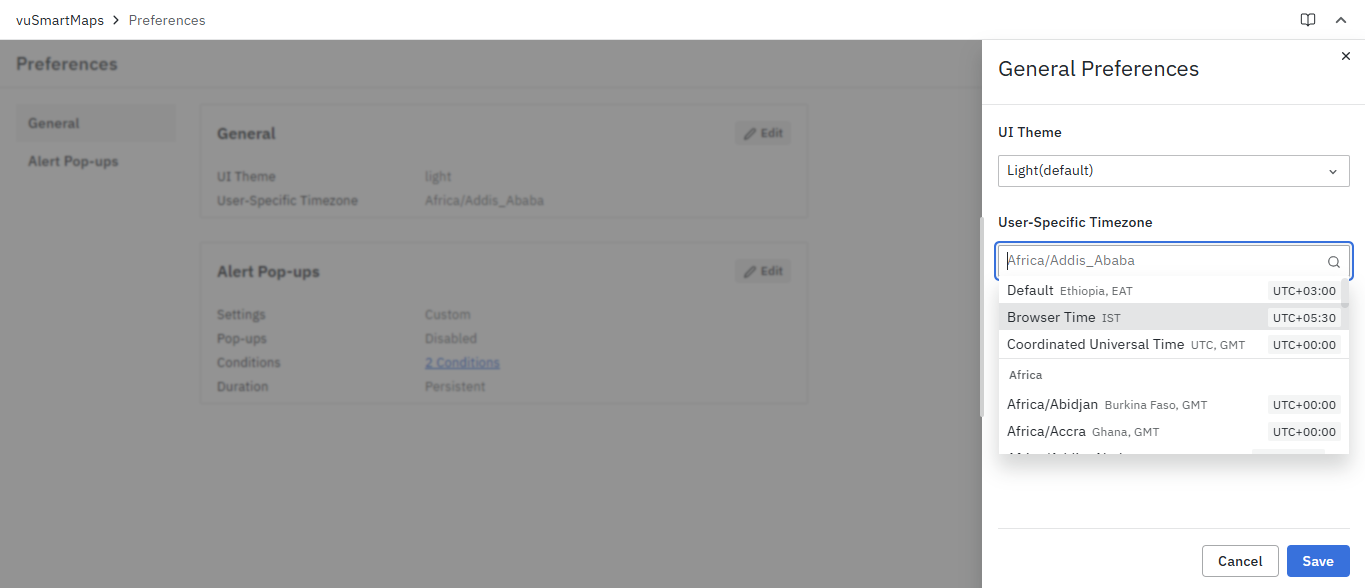
For instance let’s select the Timezone as UTC +03:00. The selected timezone will then be displayed on the top right corner of all pages.
The User-Specific Timezone will be the basis in viewing any timestamp fields in the UI. All the datetime fields that the user sees in the UI will be as per the User-Specific Timezone.
Alert Pop-ups
In vuSmartMaps, the Alert Pop-Ups integration ensures timely awareness of critical system events by displaying real-time alerts with a buzzer sound. This feature helps users promptly respond to important notifications, categorize alerts by severity, and customize alert behavior, improving monitoring efficiency and reducing the risk of missing critical issues.
The following settings apply to Alert Pop-Ups (User-Specific) Settings. For global preferences, navigate to Configuration & Preferences section.
To configure your User-Specific Alert Pop-Ups settings, follow these steps:
-
Navigate to the Admin section at the top right corner of your screen and click on the Preferences section. Select Alert Pop-ups to open the user-specific settings modal.
-
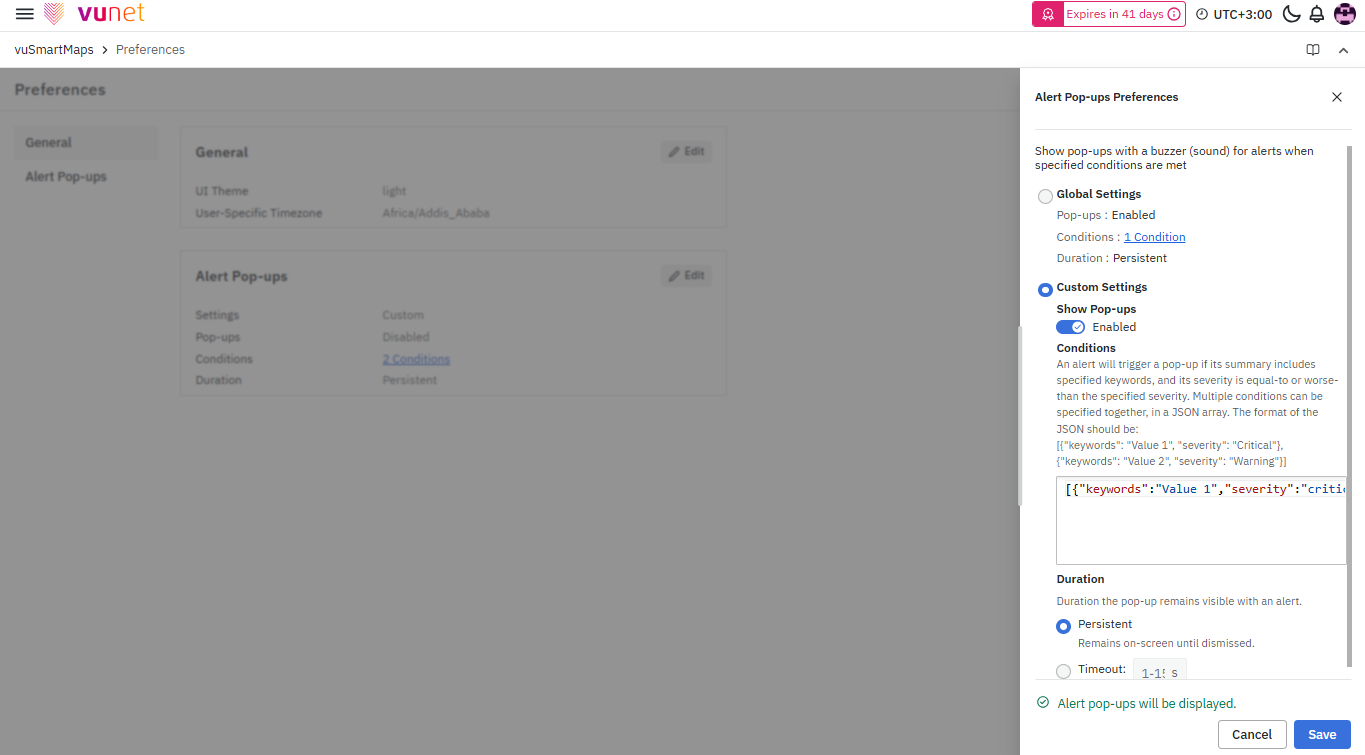
You will have two options for alert pop-up configuration:
- Select Global Settings if you want to apply global configurations.
- Select Custom Settings if you want to enable User-Specific Configurations, allowing users to customize their own alert pop-ups and override global settings.
By default, the Global Settings Alert Pop-Ups option is disabled.To proceed with global Settings, ensure that the Alert Pop-ups are enabled in the Configuration & Preferences section.
- Enable Custom Settings to activate alert pop-ups. This setting must be enabled for pop-ups to function correctly.
By default, the Custom Settings Pop-Up option is disabled. Users must enable it manually to receive alert notifications.
- Conditions: Users can define conditions for triggering pop-ups based on severity levels. Conditions should be listed in JSON format, specifying tags and their associated severity levels.
Example JSON Format:
[
  {"keywords": "IMPS, not found", "severity": "Critical"},
  {"keywords": "Delay, timeout", "severity": "Error"}
]
Severity levels:
- Critical (Red)
- Error (Orange)
- Warning (Yellow)
- Information (Green)
This allows users to customize alert notifications based on specific keywords and severity levels, ensuring that only relevant alerts are displayed.
- Duration: Users can define how long the pop-up remains visible when an alert is triggered.
- Persistent: The pop-up remains on-screen until manually dismissed.
- Timeout: The pop-up will auto-close after a defined duration.
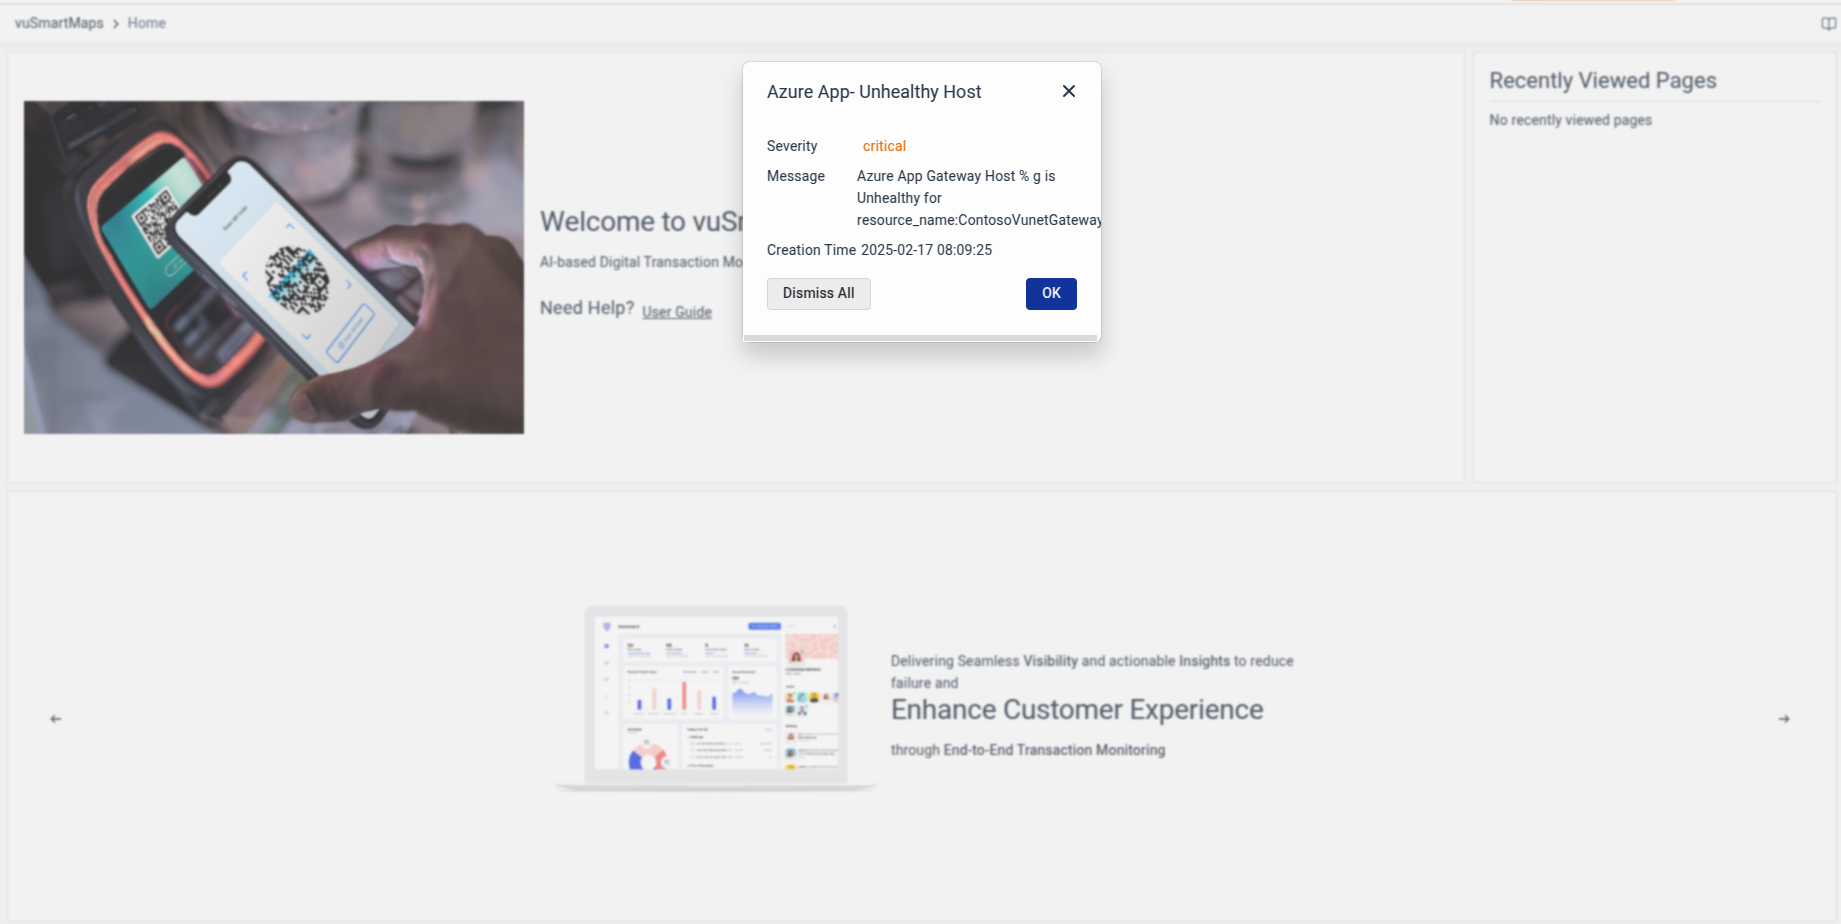
- Click on the Save button to apply these configurations, a toast message will confirm "Alert Pop-Ups configuration updated!".
Example Output:
Details on Homepage
Customer Service Panel
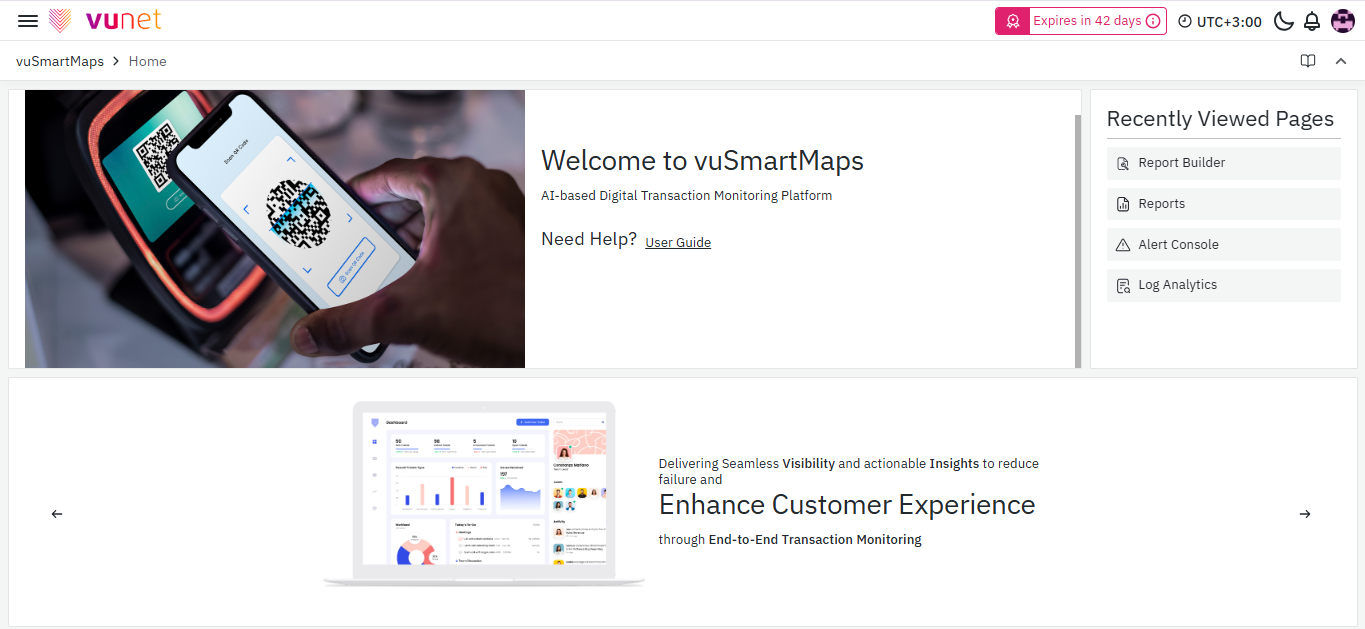
As shown in the above screenshot the customer service panel contains links to the following modules:
- User Guide
Recently Viewed Pages
This section in HomePage contains the list of Pages that you previously visited (the latest 5 pages previously visited). Thus, it provides an easy way to revisit the pages without searching for them. It is to be noted that this list of recently viewed pages will be specific to the logged-in user.
Therefore, You have learned how to navigate to the vuSmartMaps Homepage once you log in. You have also learned the basic overview of the Homepage which includes the Left Navigation menu, Customer Service Panel, and Recently Viewed Pages. Next, you will learn about the different sections in the vuSmartMaps and how to configure them.
